Egg-citing Easter decorations!
My family love Easter. It’s not just because there will be an abundance of chocolate (although that definitely helps!) but it’s the tradition we have of getting together on Easter Sunday and arranging an egg hunt for the children in the Spring sunshine. I’ve created a range of fun Easter projects for you to try yourself…I hope you enjoy these as much as I did!
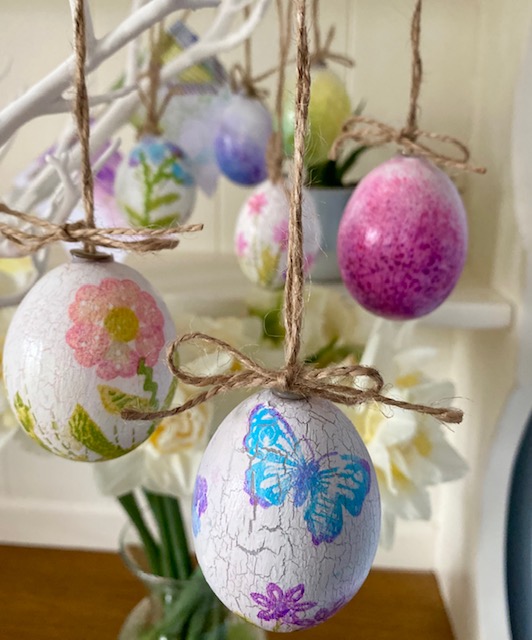
Hanging Egg Decorations
My Aunty has a beautiful set of hand painted eggs which I admire every year. . . and this year, I decided to have a go at making my own keepsake Easter decorations. The good news is that these eggs are stamped and don’t require the skill or patience of painting them by hand!
If you’d like to see how I decorated these eggs using our Nature’s Textures Layering Stamps & Stencils, then take a look at the how-to video below:
I’m sure you’ll have fun experimenting with different crackle effects! There was such a difference between painting the crackle base directly on an egg shell compared to starting with a coloured acrylic base. The different coloured cracks look fantastic on these eggs!
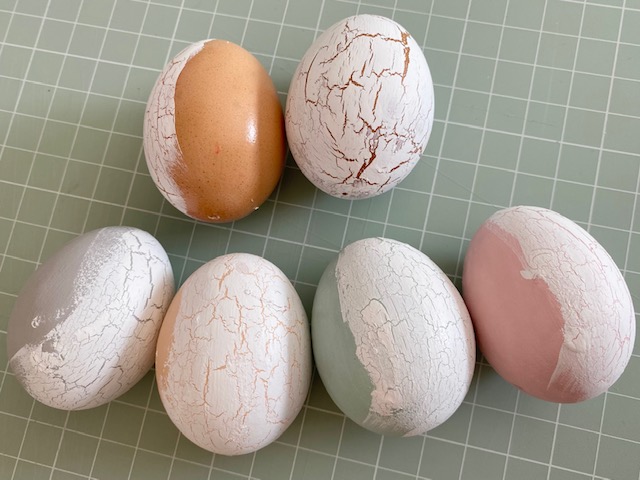
Once you’ve stamped and varnished your eggs, you don’t have to hang them. They also look pretty in a bowl or basket just as they are!
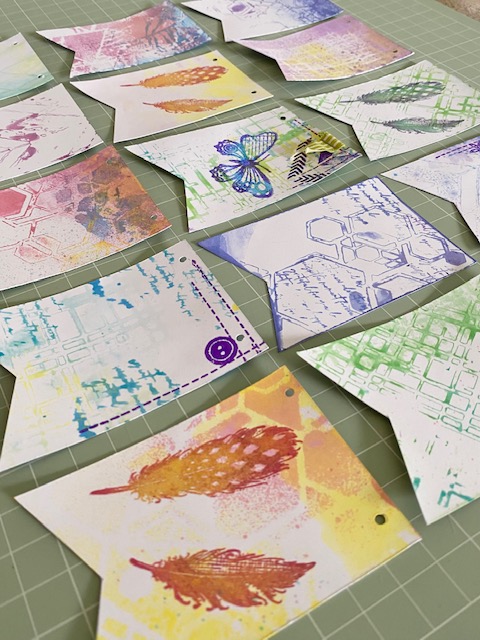
Flag Bunting
Now it’s fair to say that I did get carried away making bunting pieces using our Nature’s Textures collection, but it was a lot of fun and totally worth it! I used our Flag Bunting Template which you can download for FREE here. I’ve also included pieces of bunting in each of my Easter cards this year (scroll down to see). I found the shape useful and inspiring when thinking of card layouts! You can use this template for any occasion and not just for Easter. The holes marked on the bunting template were punched and then tied with a baker’s twine bow for a pretty finish.
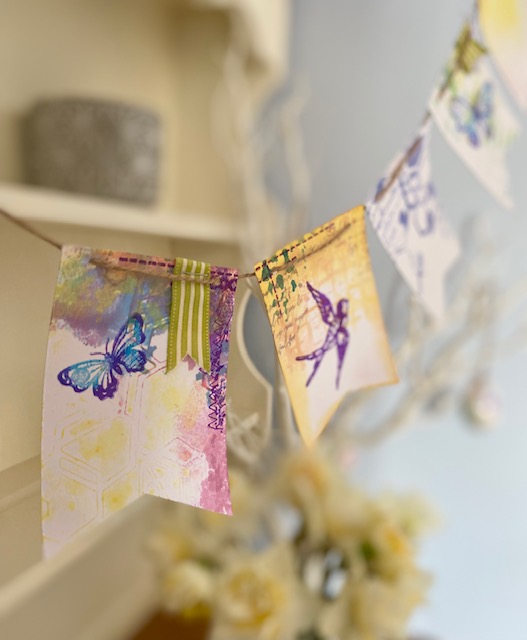
And here’s how the Easter bunting turned out…it looks gorgeous and I’m so pleased with it!! There are so many stamps and stencils in our Nature’s Textures collection that I wasn’t short of options. The faux stitching, birds and butterflies all work so well together. I used the button stamps and script text to add extra details too.
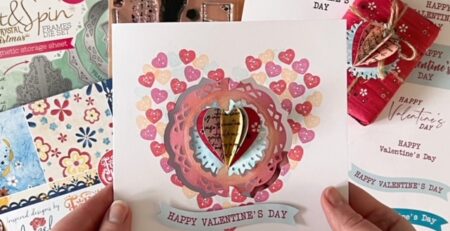
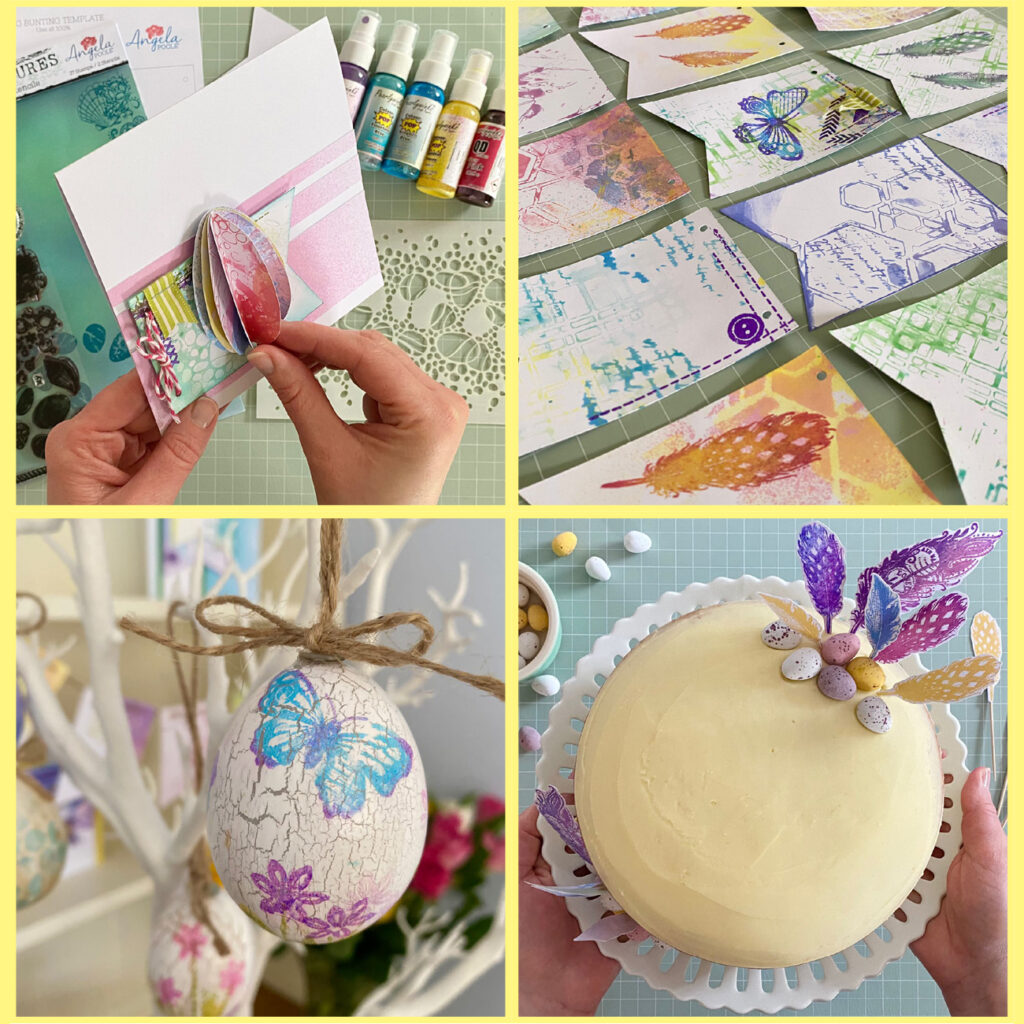
3D Folded Egg Card
If you’re looking for Easter card inspiration then this layout is a winner!
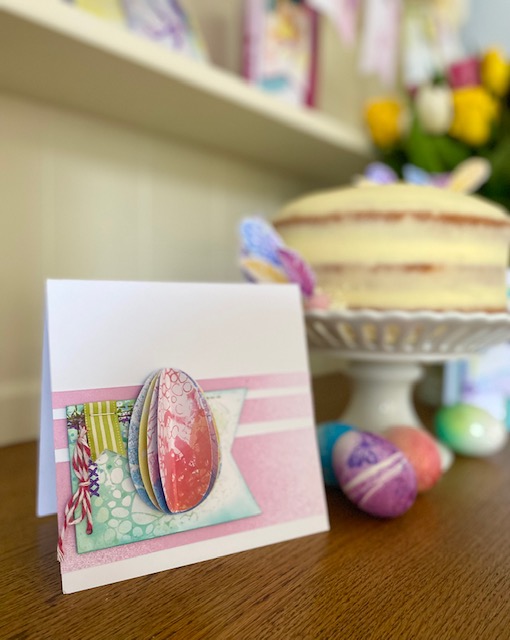
The card was quick to make and the 3D folded egg is really eye-catching – especially when you layer up different colours and patterns.
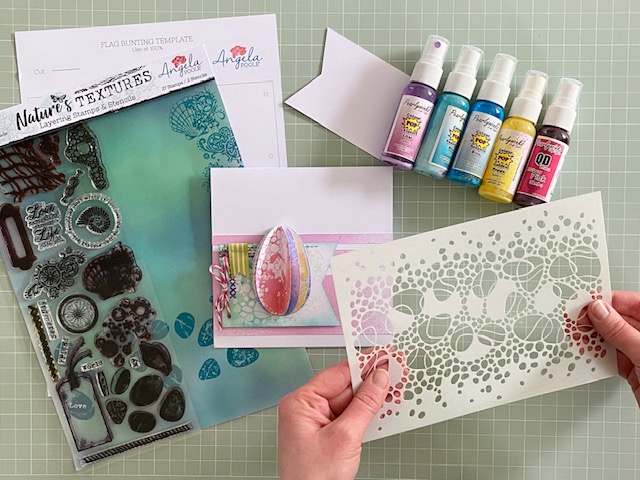
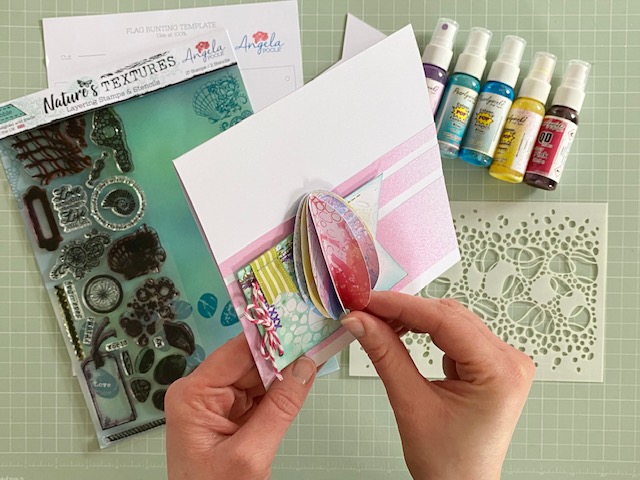
I used our Nature’s Textures Pebble set to make this 3D egg card. The pebble-themed stencil really lends itself to Easter crafting! I used a selection of Pearlywinks sprays including several Pop colours to create fun backgrounds with our stencils. I just love the watery bubble patterns that the pebble stencil creates with these inks! You can also blend your stamping inks over the stencil. Distress inks and Oxides work especially well.
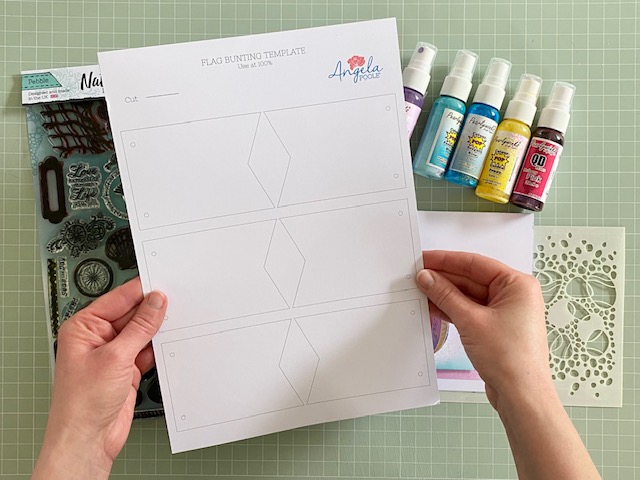
The other ‘ingredient’ for this card was our Flag Bunting Template which you can download for free here. I used this template to make the Easter bunting (above) and I’ve included one piece of bunting in each of my Easter cards this year. I found the shape useful and inspiring when thinking of card layouts.
The background of this card was created by using Pearlywinks QD Mulberry Pink spray. Once the sheet on card was dry, I trimmed it into three different widths and attached them to the front of a card base.
To make the 3D egg, I cut four egg shapes out of different stencilled patterns and folded each piece in half. I layered the eggs, fixing them along the fold lines with high-tack 3mm double-sided tape.
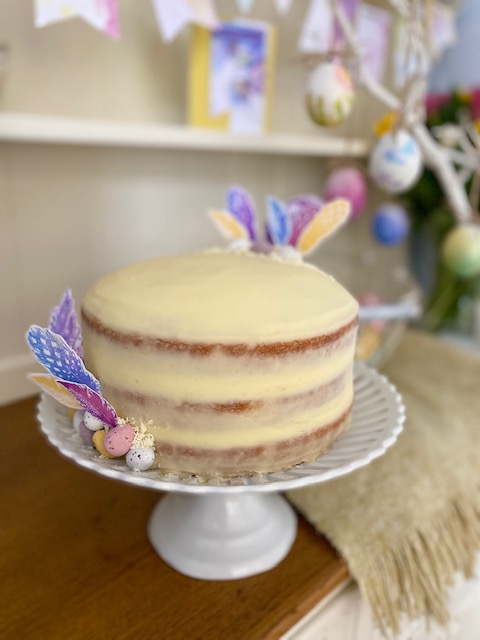
Easter Celebration Cake
An Easter celebration in our house wouldn’t be complete without the all-important Easter cake! I baked three layers of classic Victoria sponge cake and added vanilla buttercream and a little strawberry jam between the layers. It’s a popular favourite here in the UK. I’m a huge fan of the ‘naked’ cake decorating style. I like the rustic look of seeing a little of the edges of the cake. I embellished the cake with chocolate mini eggs and several handmade feather decorations.
If you’d like to make your own feather cake decorations, then here’s how:
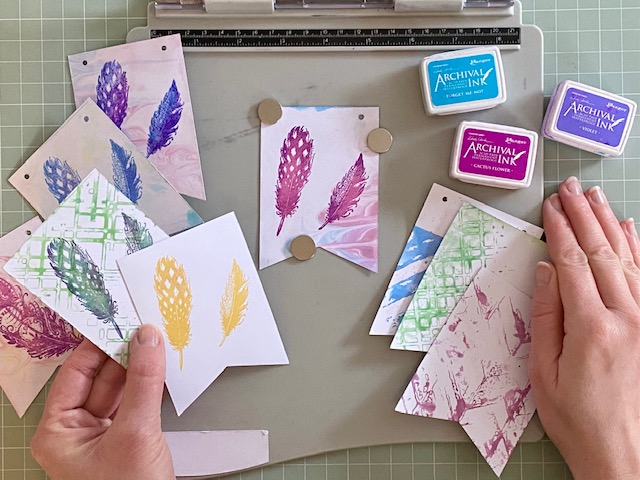
The sensible thing would be to first stamp the feathers from our Nature’s Textures Hexagon stamp and stencil set onto pieces of scrap card or even a single sheet of card. But I had a heap of ready-made bunting pieces with cool stencilled backgrounds and I knew that the feathers would look great stamped over them!
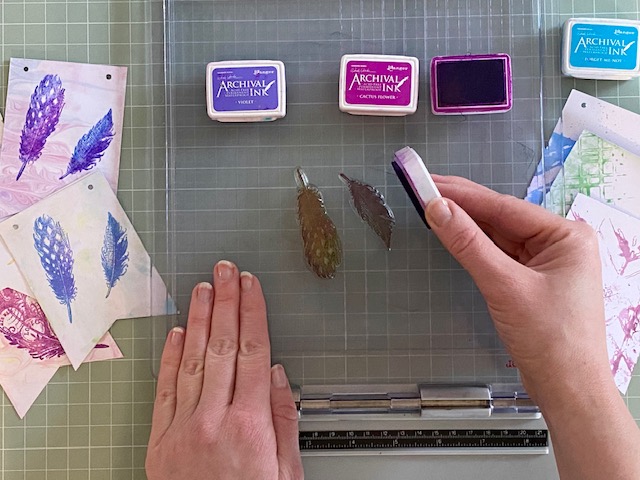
I used a range of pigment and archival inks to stamp the feathers. I inked each feather up with a couple of colours before stamping. By using a stamping press, I was able to layer up the colours even more to create interesting effects..
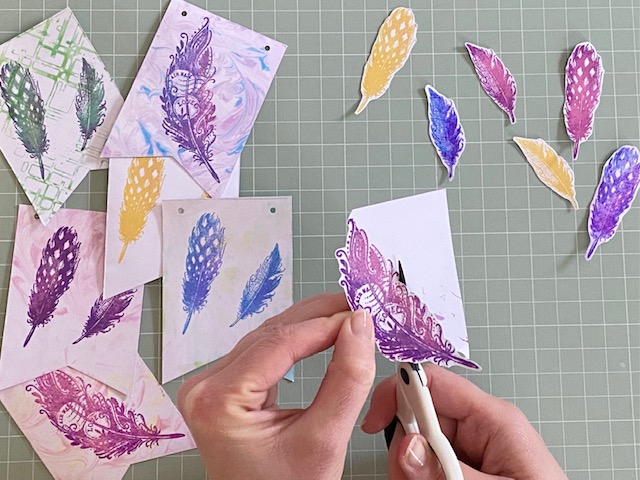
I then fussy cut the feathers. It probably only took me about 15 mins to cut them all out (as I didn’t worry too much about the edges). Alternatively, you could use a machine such as the Scan ‘N’ Cut to cut the feathers out for you.
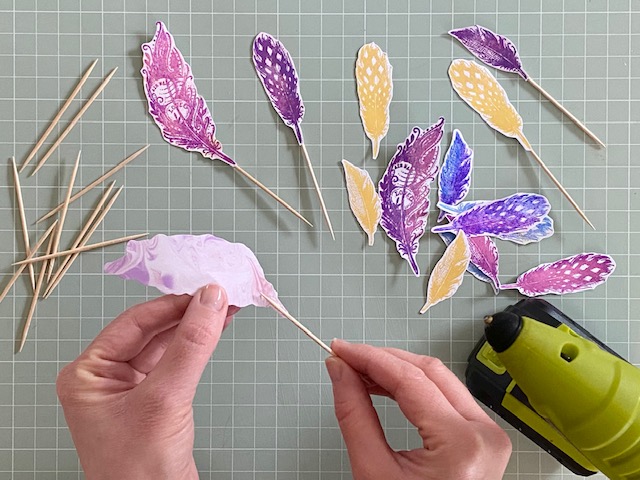
I attached a cocktail stick to the backs of the feathers using a hot glue gun.
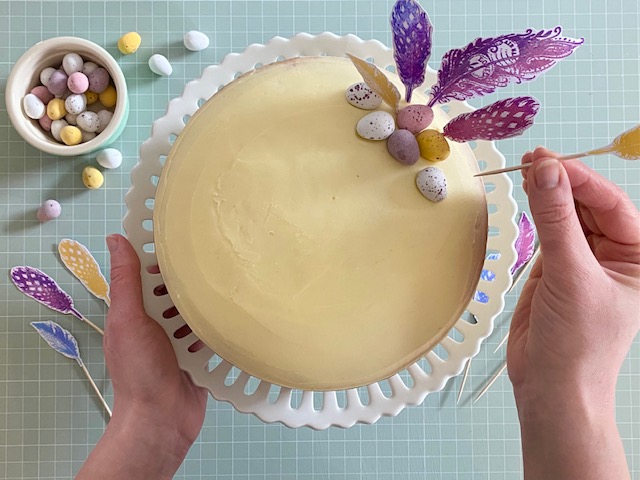
The mini eggs and feathers were arranged at opposite sides of the cake. The cocktail sticks are inserted into the cake. (It’s probably best to remove any feather/cocktail sticks before cutting and serving the cake!)
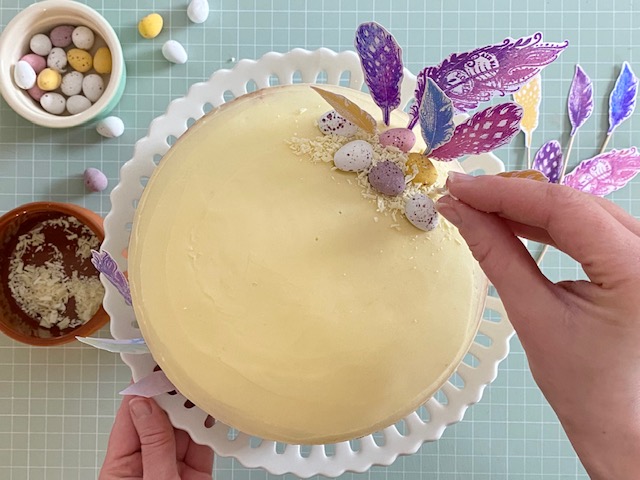
I finished the cake by sprinkling white chocolate shavings to add to the nest-like look.
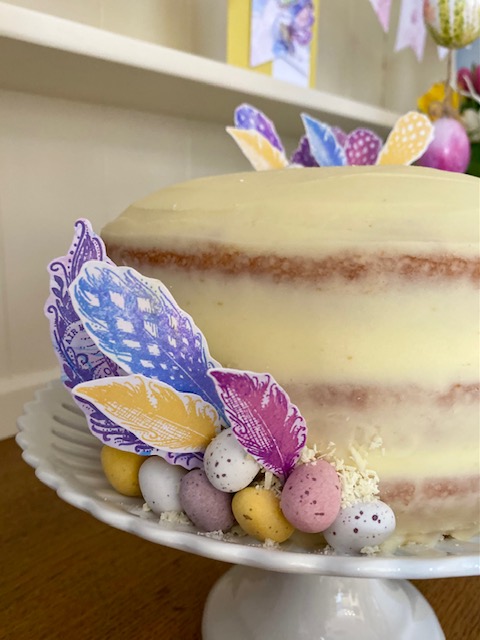
Here’s a close up of the bottom cluster of eggs and feathers.
I hope you find these crafting ideas egg-stremely useful and are as egg-cited about Easter as we are! Have I missed out any puns?? They crack me up!
Please stop by again for more inspiration 🙂
Happy crafting!
Angela
x