Poinsettia Christmas Crackers!
Handmade Christmas crackers have been on my crafting bucket list for YEARS but you know how it is, busy, busy…
I’m sure there are plenty of templates online for the complete DIY approach and yes, I could create my own template, BUT if you don’t happen to have hours to spare cutting and scoring, then you may prefer the idea of embellishing a ready-made cracker kit? You could even add a touch of luxury to plain, store-bought crackers!
I think one of the best things about making Christmas crackers is that you can include personalised gifts inside them as a surprise! It’s been fun shopping for the little gifts too. 😉
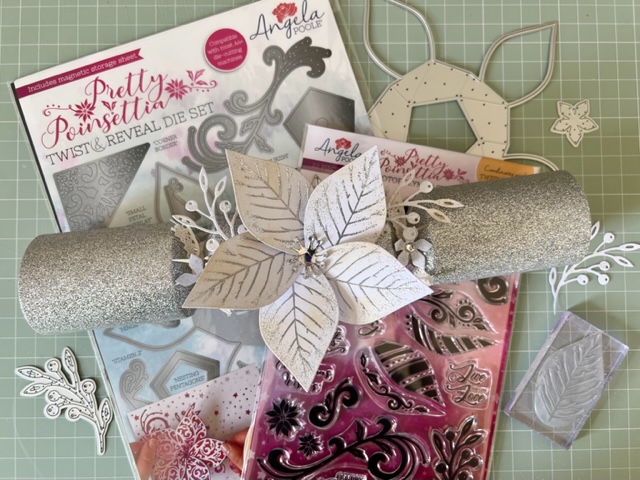
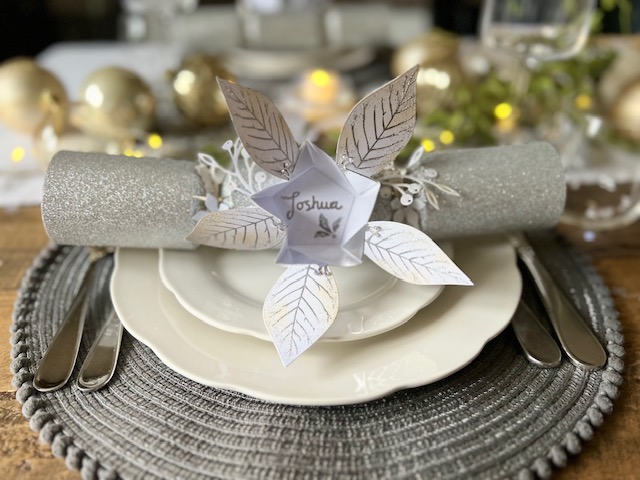
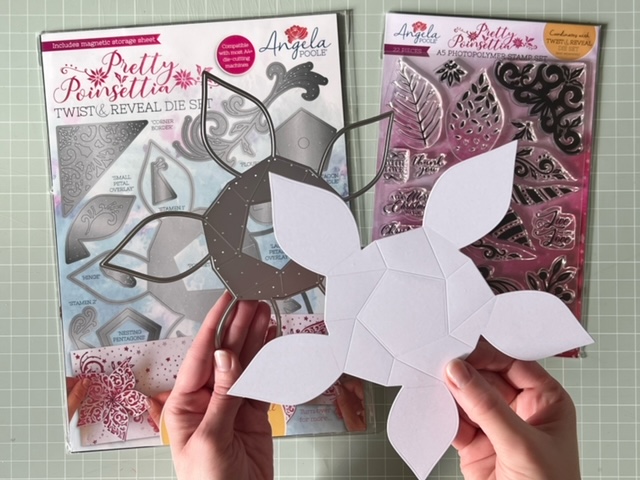
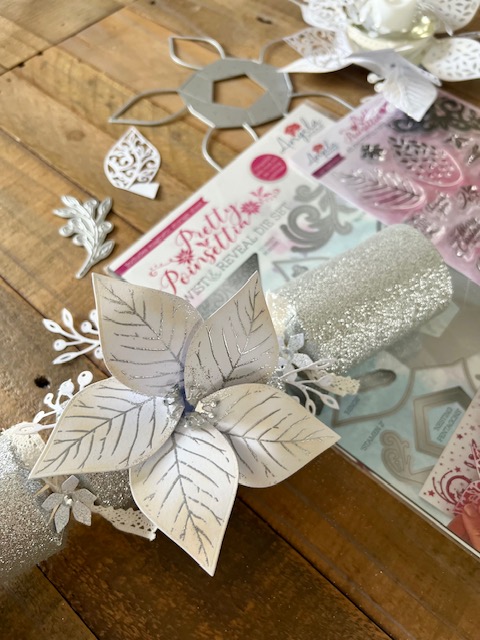
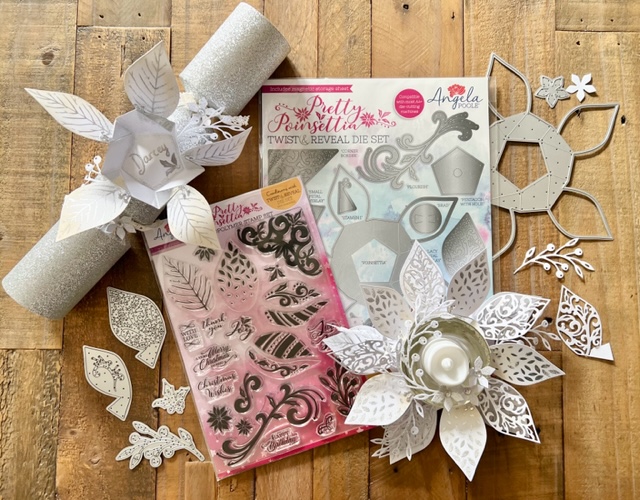
Our Pretty Poinsettia Twist & Reveal die set creates a truly spectacular poinsettia which opens to reveal a personalised name for each cracker! It’s a beautiful way to add place card names to your festive table setting too.
These poinsettia Christmas crackers are surprisingly quick and easy to make.
The Pretty Poinsettia Twist & Reveal die set also includes festive sprig flourishes and small flowers that are really handy for embellishing the crackers.
I’ve used a silver and frosted white colour scheme to create a simple, yet elegant look for this table setting. Of course you can use any colour scheme you like to match the crackers to your Christmas decorations. I can imagine how striking the poinsettias would look in a classic red or a rich gold!
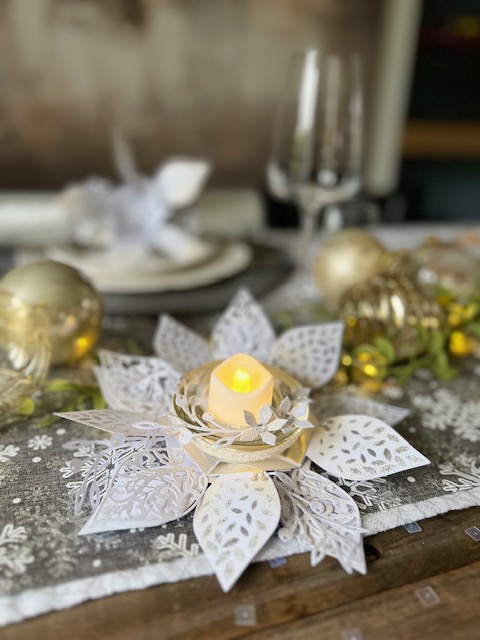
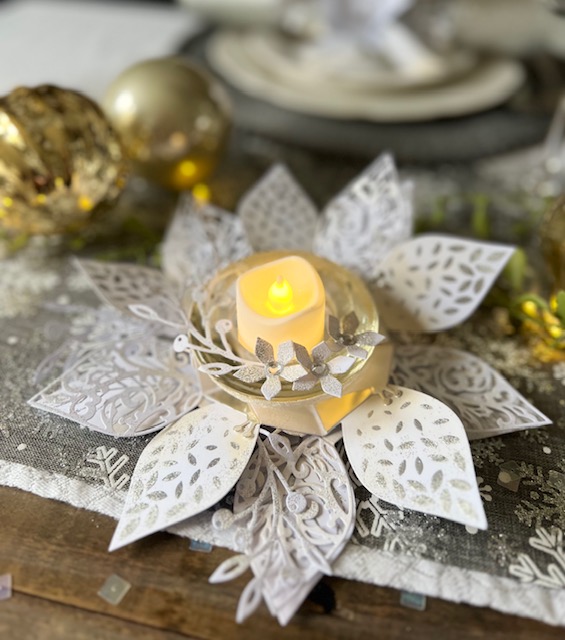
You can even create coordinating poinsettia table decorations like this beautiful LED candle decoration. I’m so pleased with how it turned out!
I used the Pretty Poinsettia Twist & Reveal die set and coordinating Pretty Poinsettia A5 stamp set make both the Christmas crackers and the LED table decoration.
Our Poinsettia stamp set works beautifully with the dies and I especially like using the petal-shaped stamps to add patterns and details!
The die set was originally designed for making unique Christmas cards with a Twist & Reveal Poinsettia flower – the poinsettia can SPIN 360 degrees on a card and opens out to reveal a hidden greeting/message!
So, as well as creating fantastic Christmas cards, you can also use it to make poinsettia-themed Christmas decorations!
If you’d like to have a go at making these Christmas crackers, then here’s a step-by-step guide:
Pretty Poinsettia Christmas Crackers
Start by die-cutting the poinsettia flower base from 200gsm white card. The die will mark the fold lines on the card for you.
You’ll also need to die-cut a pentagon centre, two festive springs and two small flowers from white card for each cracker. The five stamen pieces are die cut from silver mirri card. All of these dies are included in the Pretty Poinsettia Twist & Reveal die set.
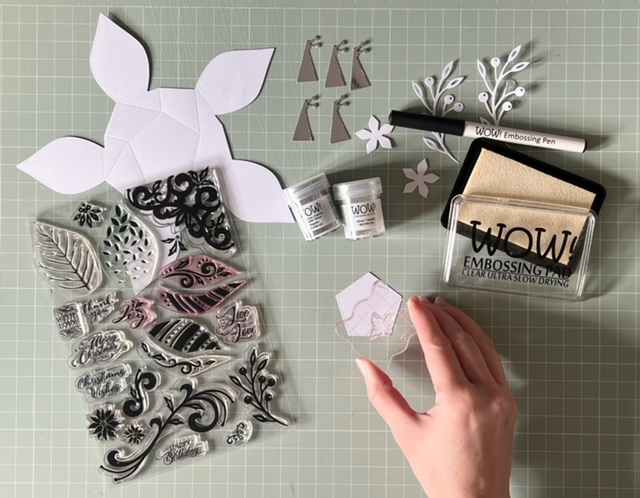
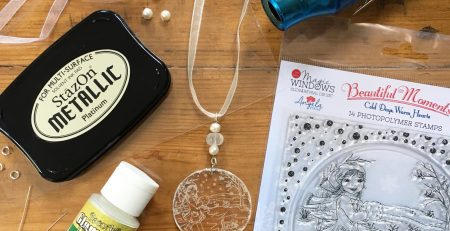
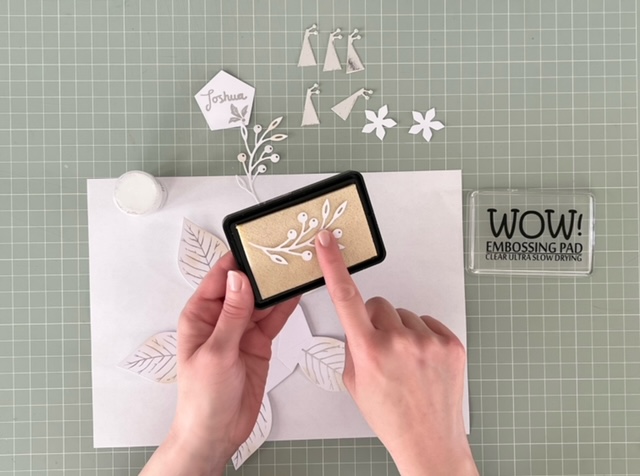
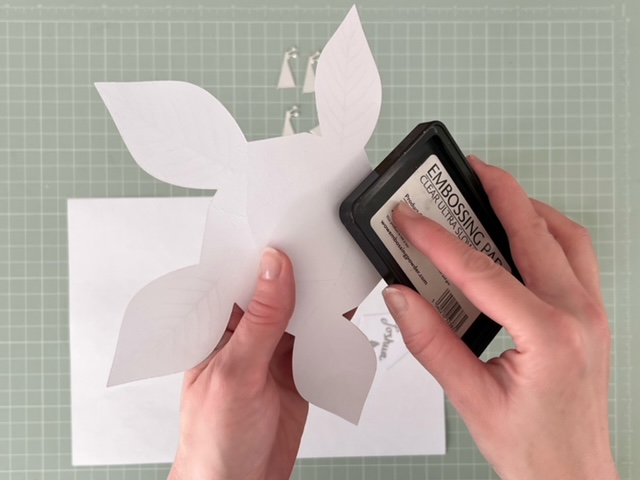
When using embossing powders, it’s a good idea to apply an anti-static pad over the surface first. Here, I’m stamping a corner detail from the Pretty Poinsettia A5 stamp set, using an embossing ink pad. Next, you can sprinkle silver embossing powder over the stamped area. I’ve used Wow! Metallic Silver, Regular embossing powder and their White Twinkle embossing powder.
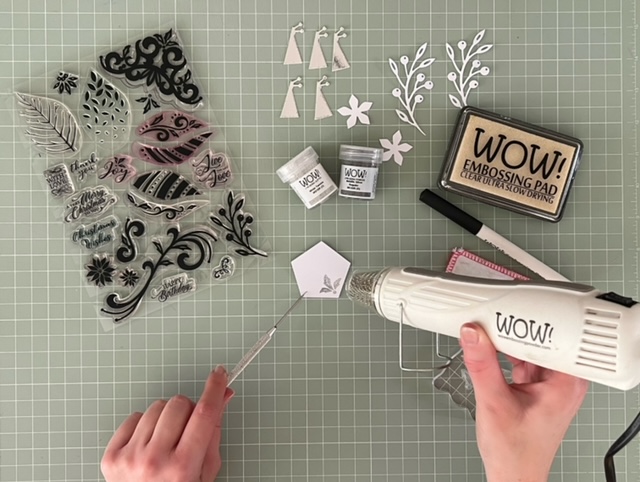
Use a craft heat gun to melt the embossing powder, creating a shiny, metallic finish.
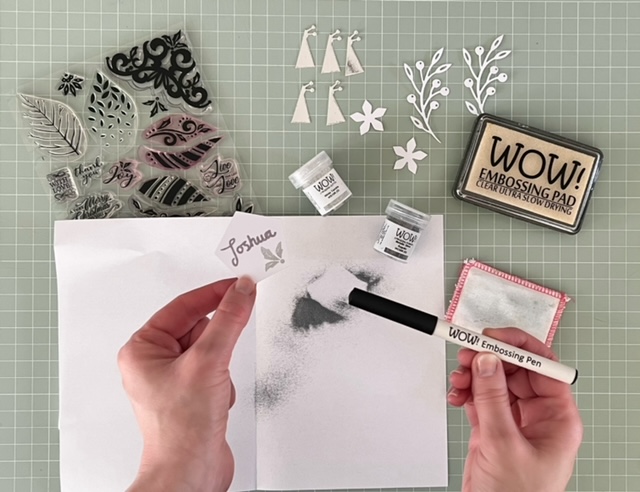
You can simply use a pen or metallic marker to personalise the Christmas cracker. I find the Wow! Embossing Pen really useful . It’s like using a felt tip pen but it writes in a pink adhesive that’s suitable for embossing powders and dries clear.
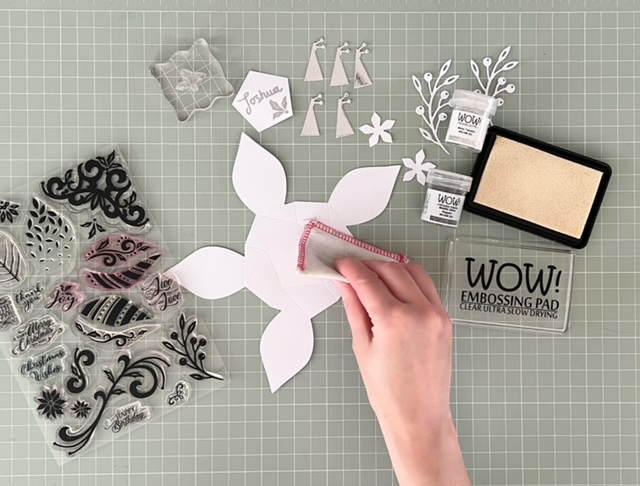
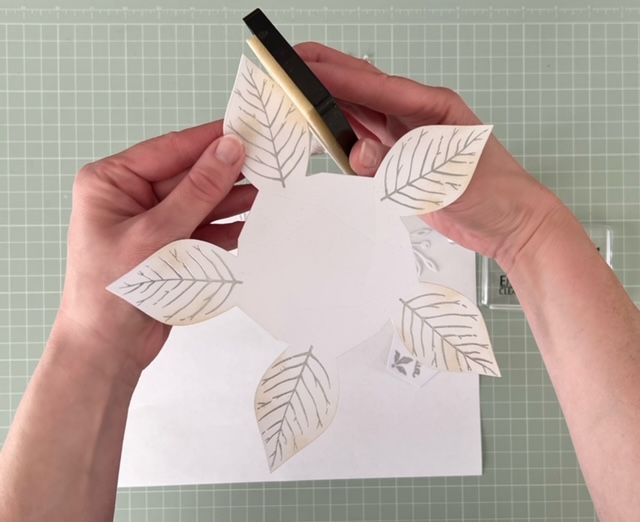
Before stamping and embossing the petals, it’s a good idea to rub the surface of the poinsettia with an anti-static pad. This will help to prevent any loose embossing powder particles from attaching themselves to the card.
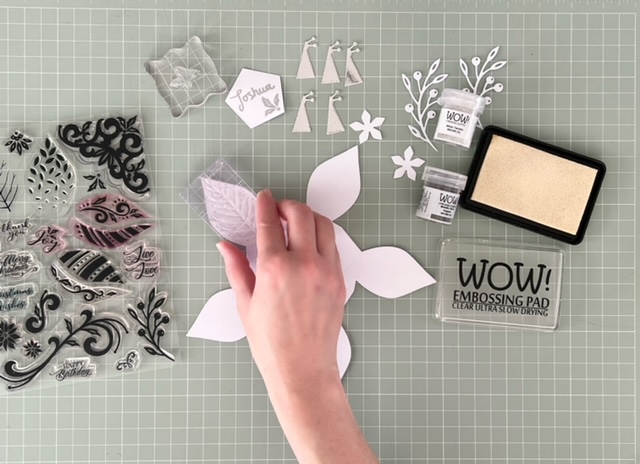
Our Pretty Poinsettia stamps are made from a crystal clear, high-quality photopolymer. Here you can see how the edges of the photopolymer line up perfectly with the edges of the petal. It makes positioning the stamp so easy!
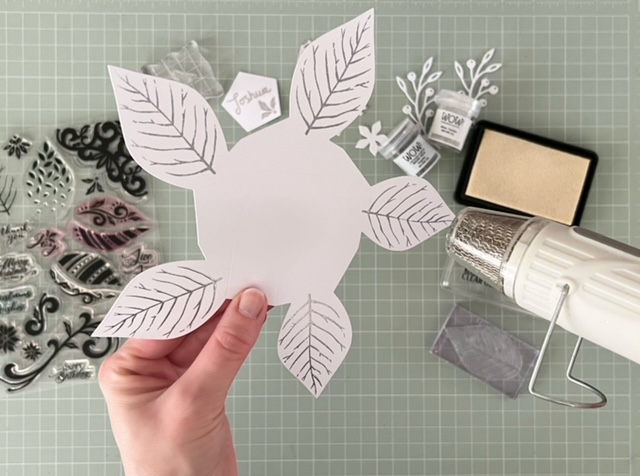
I stamped each of the five petals with the leaf stamp using an embossing pad.
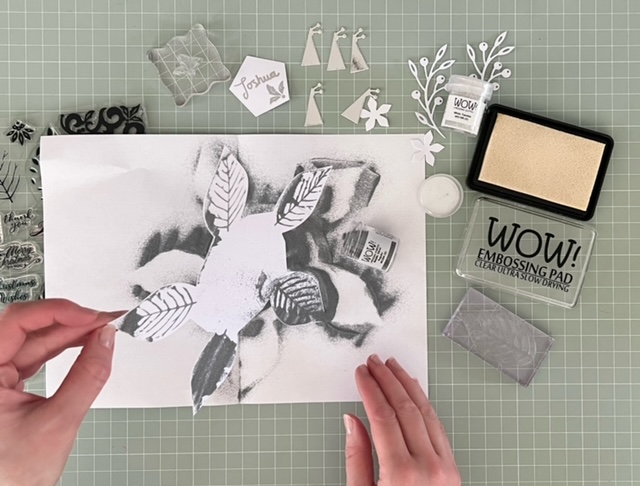
Sprinkle silver embossing powder over the poinsettia and tap off any excess. If you do this over a folded sheet of paper or card, you’ll find it easier to pour the left-over powder back into the pot.
Melt the embossing powder gently using a craft heat gun. The finish can turn dull if you over-heat the embossing powder, so it’s best to watch it carefully and move the heat onwards to another area or stop once it has melted.
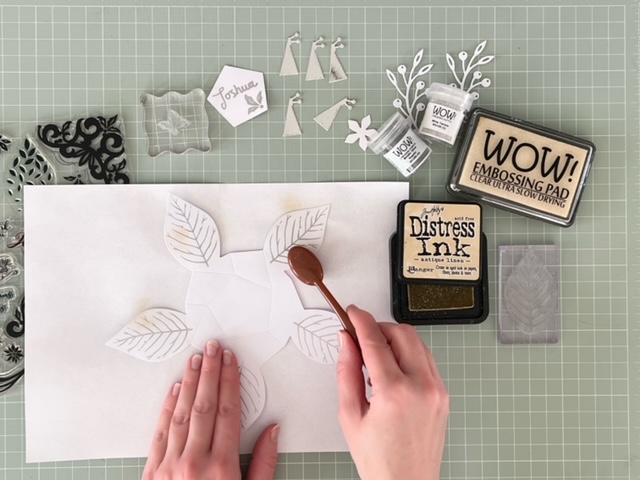
Here I used a blending tool and Antique Linen Distress Ink to add a little depth of colour to the poinsettia. You could use a silver or grey ink if you’d like to stick to a strictly white and silver theme. I’m including a hint of gold with my table setting and I found that adding a touch of a warm, cream colour really helped to coordinate the crackers with the other Christmas decorations.
I wanted to give the crackers a look of frosted, glistening snow and Wow!s White Twinkle embossing powder was perfect! I applied the embossing pad directly to the edges of the petals and around the pentagon. The Wow! embossing pad is slow drying, so was able to apply adhesive to all of the die-cut pieces before adding the embossing powder:
I pressed the die-cut sprigs and flowers face down on to the embossing pad.
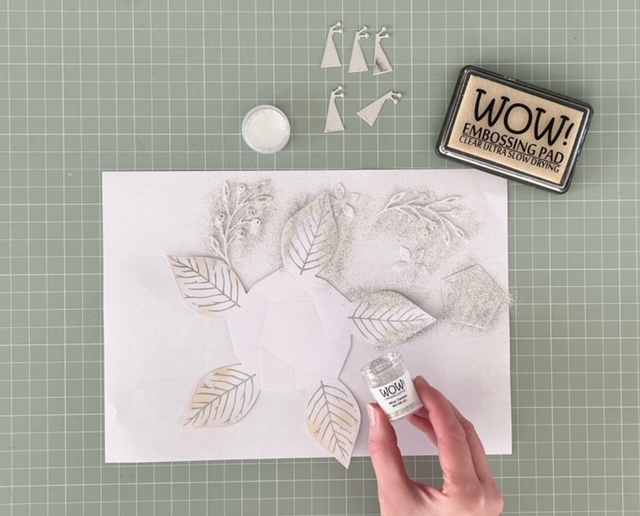
I sprinkled the White Twinkle embossing powder over the die-cut pieces and then heat embossed them using a heat gun.
Repeat the process to apply the embossing pad and White Twinkle embossing powder to the back edges of the poinsettia.
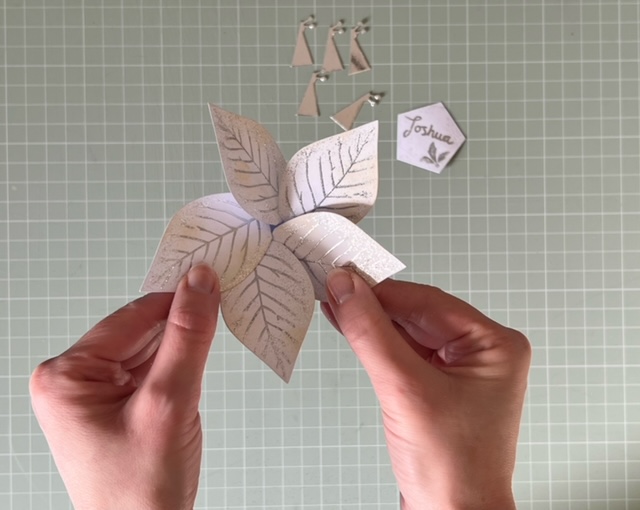
You’re then ready to fold the poinsettia. Follow the folding instructions on the packaging or take a look at our how-to video here.
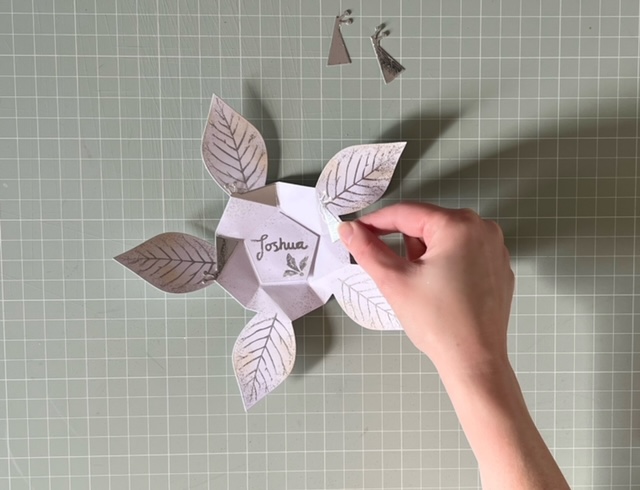
The five stamen pieces can be attached using tacky PVA glue. I always make sure they line up with the bottom left corner of each petal for a neat finish.
You can add extra sparkle to the ends of the stamen with small adhesive gems.

The next step is constructing the Christmas crackers from a pre-made kit. I chose a silver glitter pack with snappers, party hats and of course, those traditional terrible jokes! Don’t forget to pop in the surprise gift.
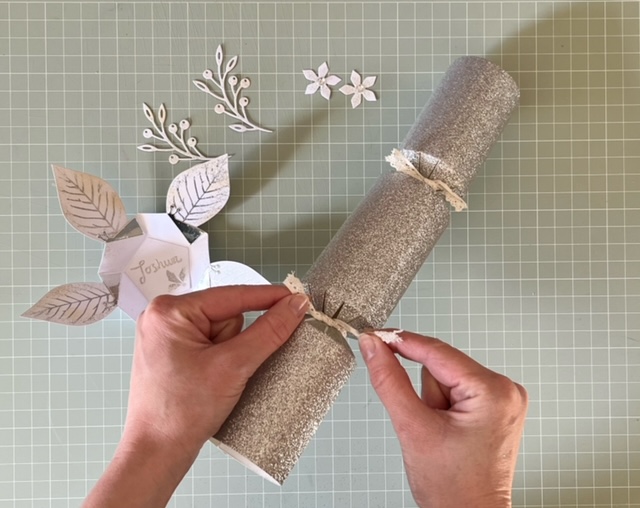
And here’s how it all comes together! I tied the cracker ends with short lengths off-white lace.
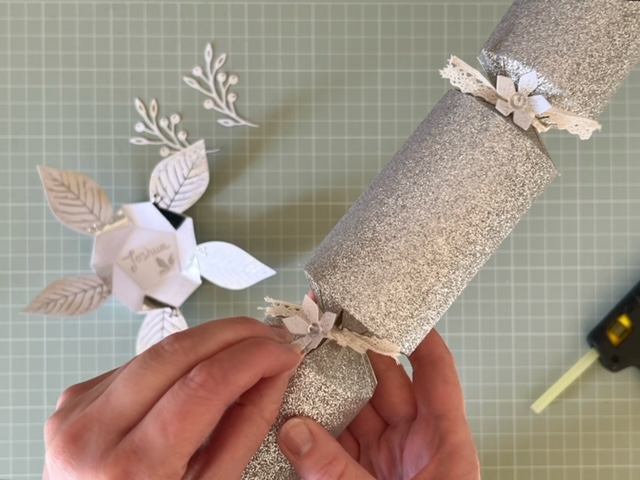
I attached silver adhesive gems to the flower centres and secured them over each lace knot with a hot glue gun.
Next, I attached the poinsettia directly to the centre of the cracker. If you’d like the poinsettia to spin, then this is possible using the ‘pentagon with hole’ and ‘brad’ dies from the Pretty Poinsettia Twist & Reveal die set.
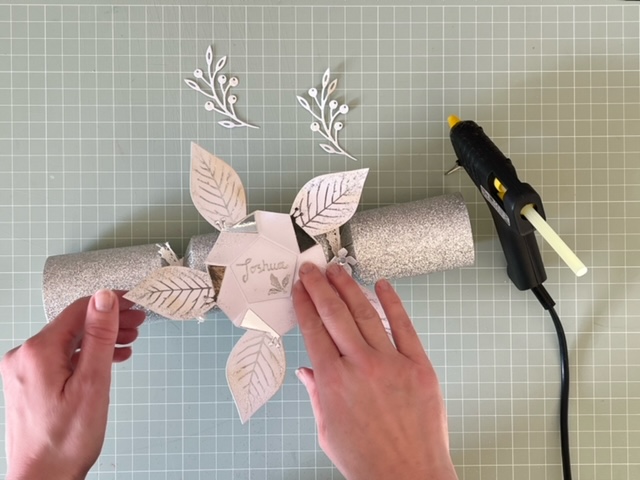
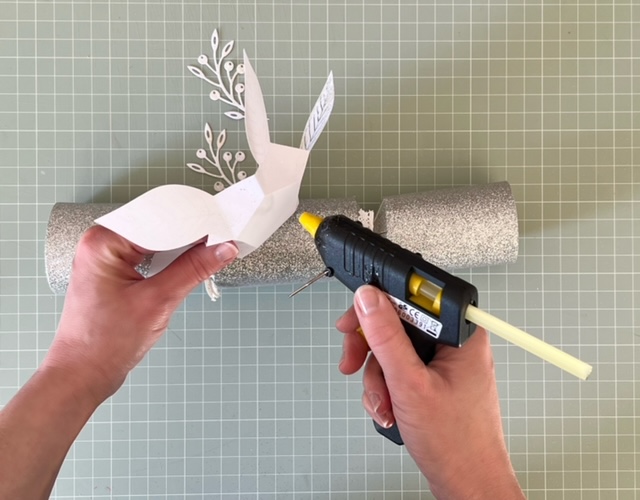
I finished the cracker by attaching the sprigs at opposite corners of the poinsettia.
And here’s how it looks! The poinsettia flowers can be displayed opened or closed.
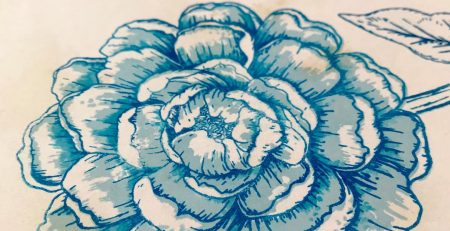
Here’s a closer look of the poinsettia LED table decoration below…
I hope you love using the Pretty Poinsettia die set as much as we do, to create a range of Christmas makes and more!
Please stop by again for more crafting inspiration.
Happy crafting!
Angela
x