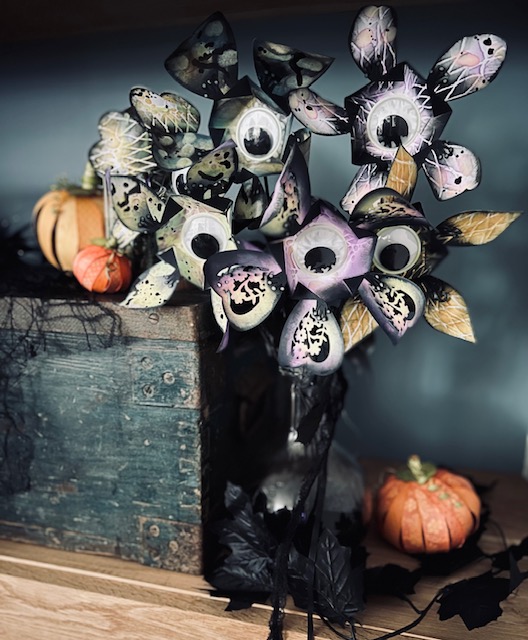
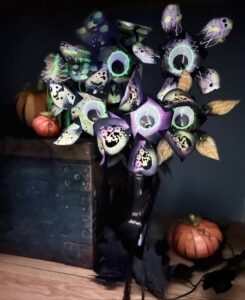
Boo-tiful Halloween Decorations!
When designing our Twist & Reveal Wild Flower and Pretty Poinsettia die sets, I had no idea that they would make such spook-tacular Halloween flowers!
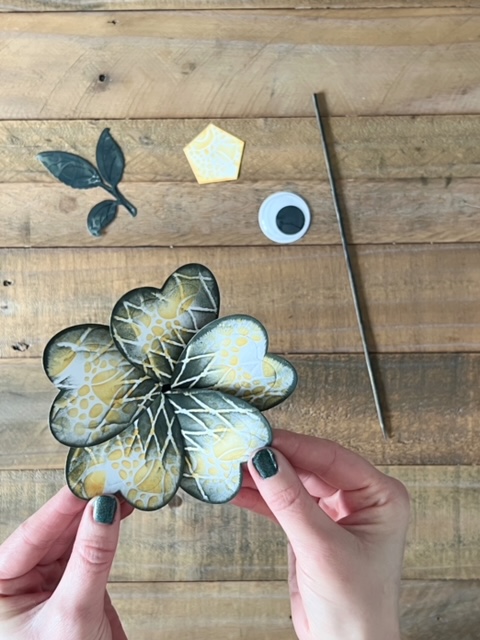
The centre of the flowers is large enough to reveal a giant-sized googly eye which rattles around as the flower moves! The petals close in around it too, which makes for a fun surprise when the flower is opened!
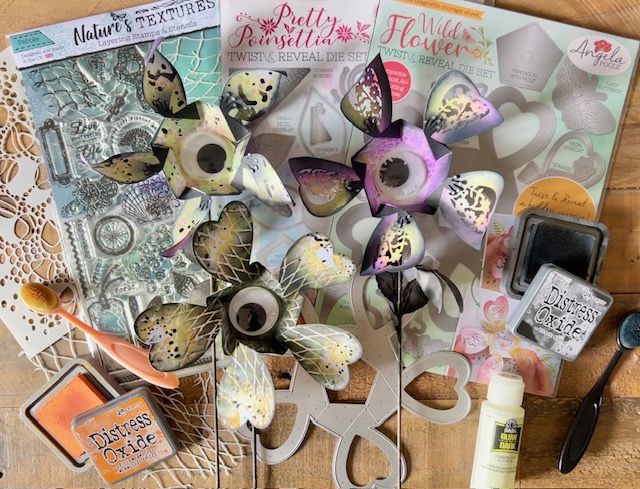
To make these spooky flowers, you’ll need either our Twist & Reveal Wild Flower or Pretty Poinsettia die set. I’ve used the two stencils from the Nature’s Textures stamp and stencils ‘Pebble’ set. These products are on special offer this month, so grab a bargain whilst stocks last! 😉
Here’s how quick and easy the Boo-tiful Halloween flowers are to make:
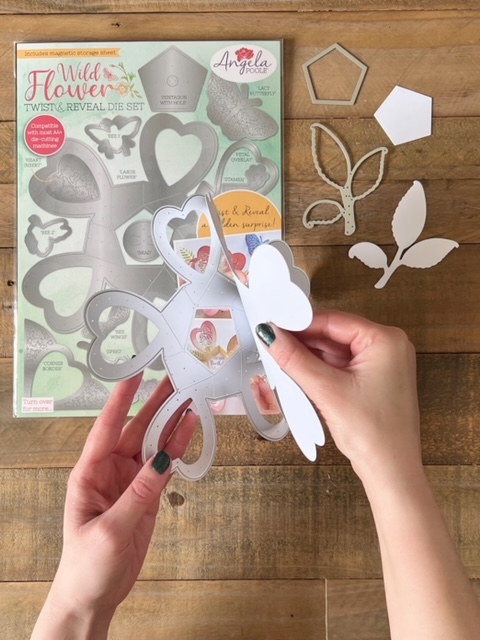
Start by die-cutting the main flower from white card. A thickness of 200gsm is perfect. Here I’m using the Wild Flower Twist & Reveal die set and I’ve also die-cut a solid white pentagon (for the back of the flower) and a leaves from the same die set.

The die marks handy lines in the card which make it easy to fold the flower.
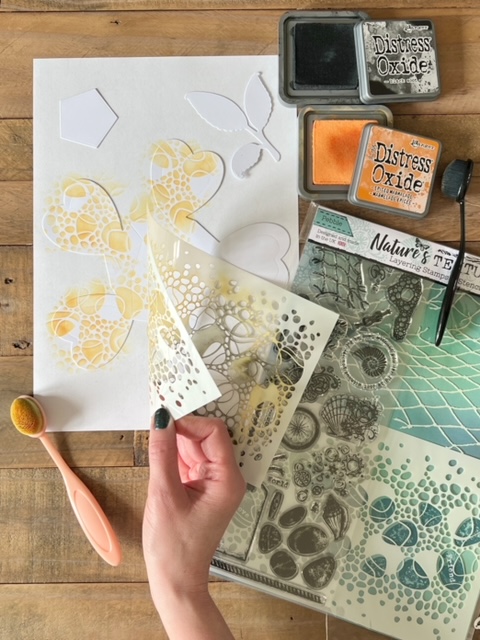
I’ve used the beautiful Pebble stencil and ‘Spiced Marmalade’ Distress Oxide to create a background pattern over the flower.
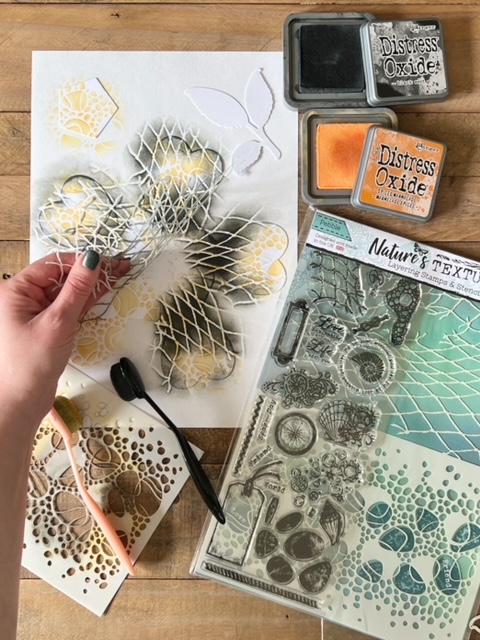
Next, I layered the Fishing Net stencil over the top with ‘Black Soot’ Distress Oxide.
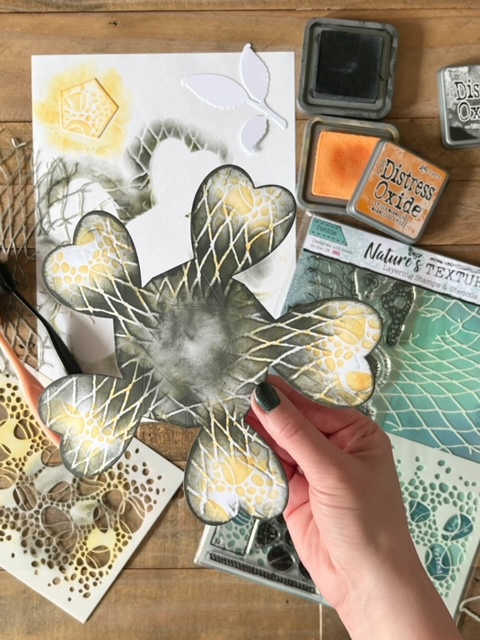
I added black ink to the edges of the flower and stencilled over the white pentagon with the Pebble stencil design. I used black ink and the Pebble stencil to add a background pattern to the leaves as well.
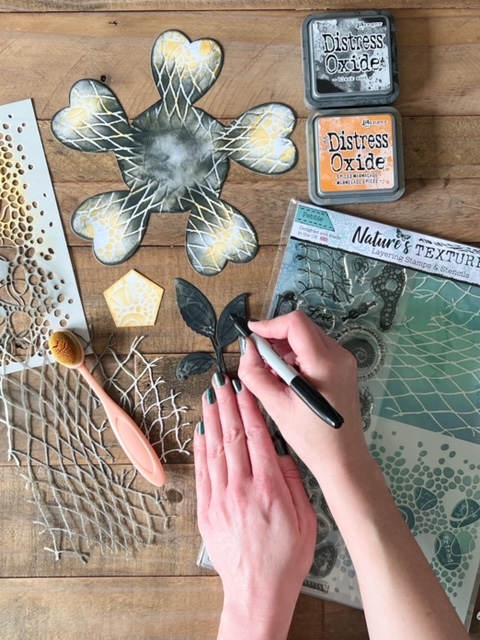
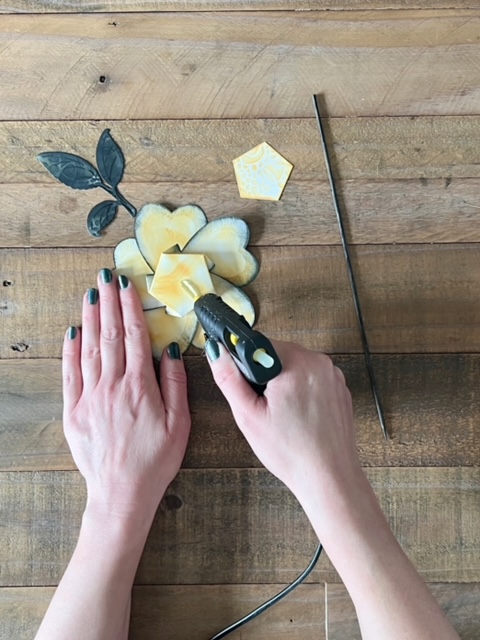
I added a few quick details to the leaf with a black pen.
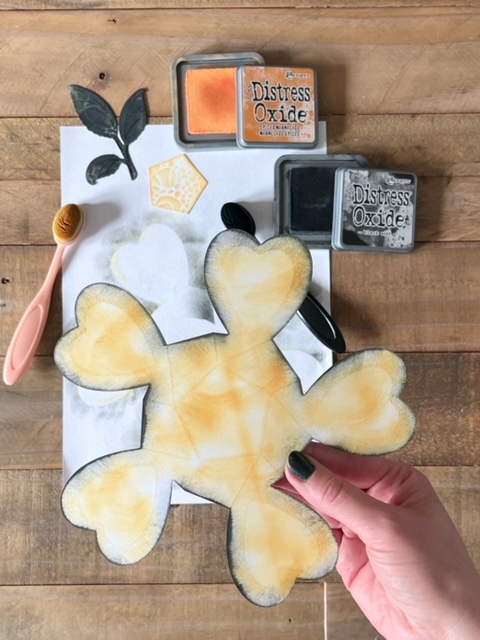
A bit of colour was added to the back of the flower using the same Distress Oxides and blending brushes.
The next step is to fold the 3D flower. You’ll find simple step-by-step instructions for how to fold the flower on the packaging of both our Twist & Reveal Wild Flower and Pretty Poinsettia die sets.

You can then open out the flower and attach the self-adhesive googly eye.
I used a hot glue gun to attach the flower stem (which is a wooden kebab stick that I painted black). You can then cover the back of the stick by attaching the stencilled pentagon over the top with more hot glue.
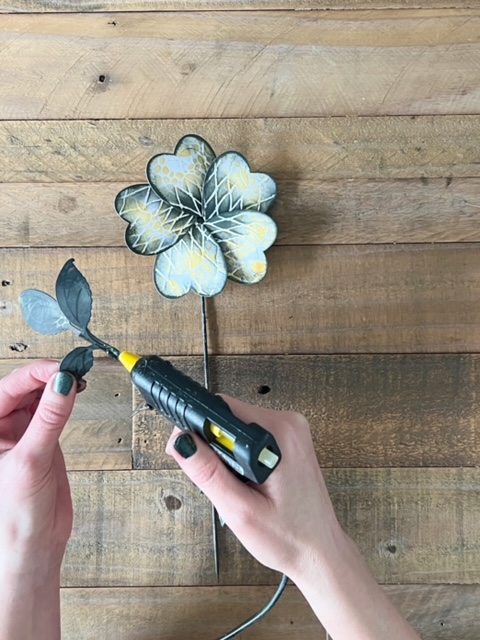
I curled the leaves slightly with my fingers and then attached them to the stem of the flower.
You can of course add more leaves if you wish.
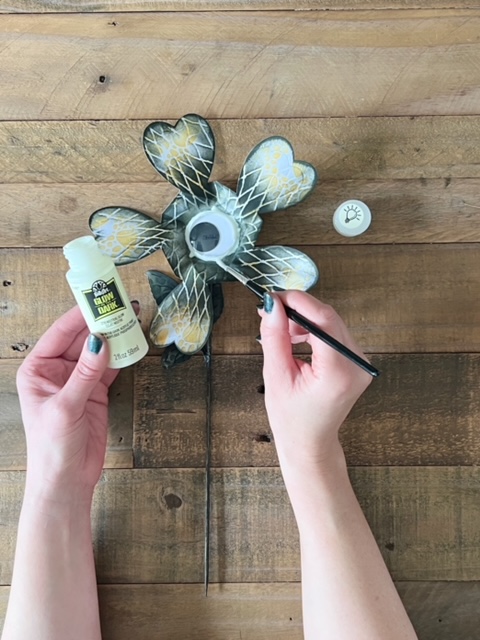
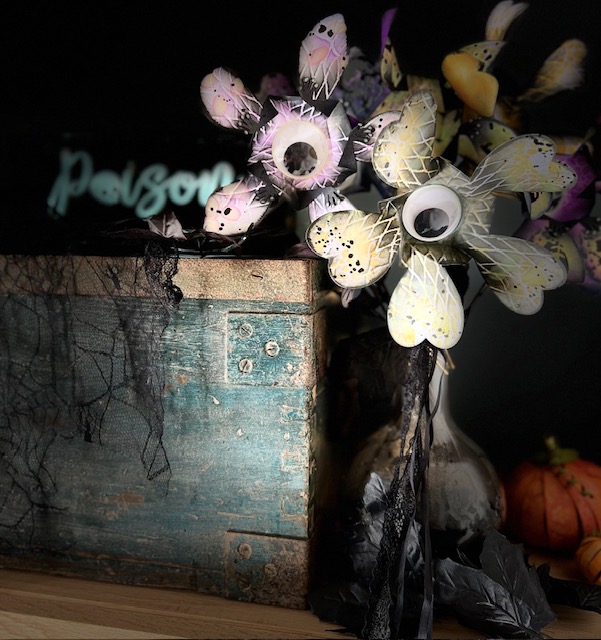
Just for fun, I decided to add some glow-in-the-dark paint! I find that you do need to apply several layers for the paint to glow, and so I was quite generous with how much paint I applied!
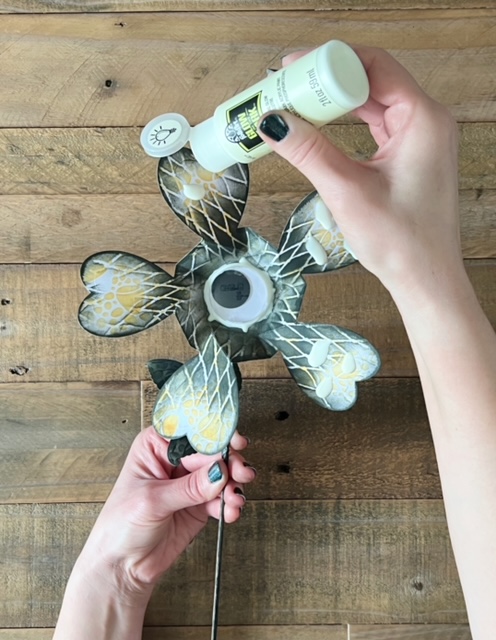
When I say the paint application was ‘generous’, I’m not exaggerating.
I allowed large drops of paint to fall on to the petals and occasionally the paint dripped off the edges!
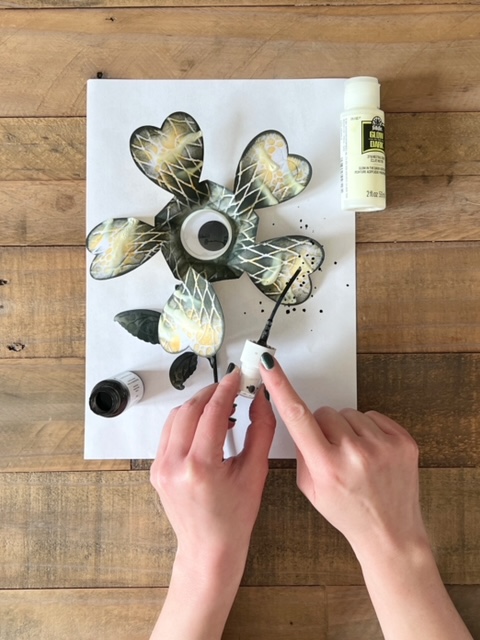
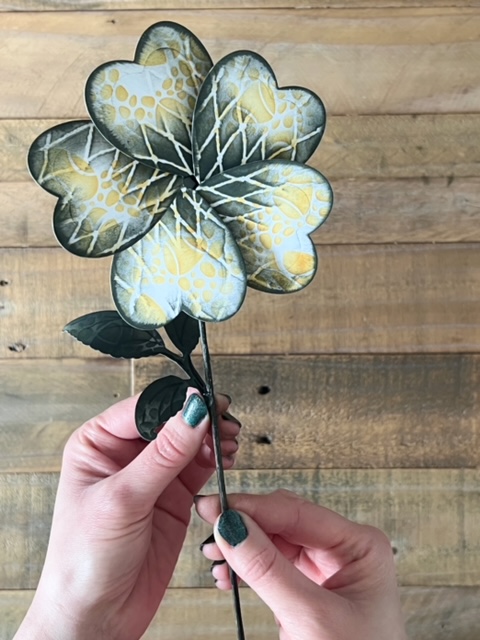
Once dry, I finished the flower with random splats of black ink to add to the spooky look. This flower used our Wild Flower die set to make a flower with curved petals.
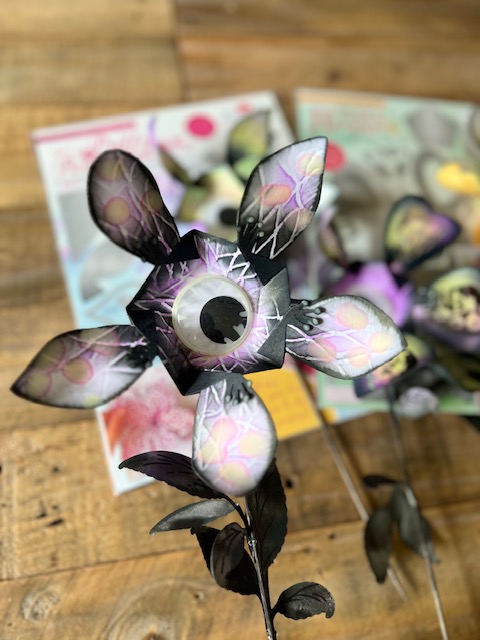
If you like that flower, then here’s another look for a similar flower (with pointed petals) using our Pretty Poinsettia die set. You can combine the die-sets too as they work together beautifully. I’ve used the stamen from The Wild Flower die set and attached them to this Poinsettia flower.
I even added glow-in-the-dark paint to the stamen. I can’t wait to see how it looks in the dark!

So lights on…
and lights off!!
Actually the glow-in-the-dark paint looks really cool! I’ll definitely use it again for Halloween crafts.
Here’s another idea for a quick Halloween make:
Spooky Bell Jar Decoration
I had a plastic bell jar which already had a twig and a few die-cut flourishes attached to the centre from our Hummingbird die set. It seemed the perfect time to give it a spooky make-over!
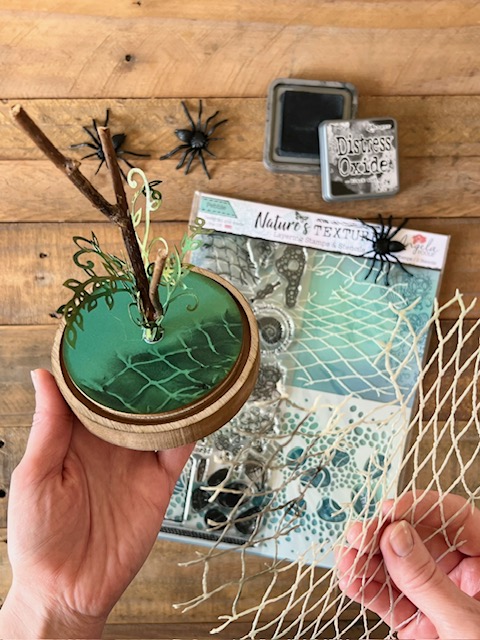
The Fishing Net stencil looks almost like barbed wire when combined with Black Soot Distress Oxide. I stencilled different areas of the design around the green base.
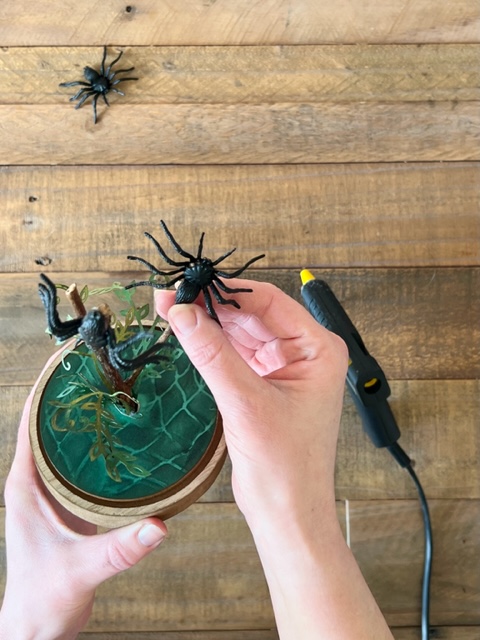
After a quick search through our old Halloween decorations, I found a few plastic spiders which were the perfect addition to the bare twigs. I secured them in place with a hot glue gun.
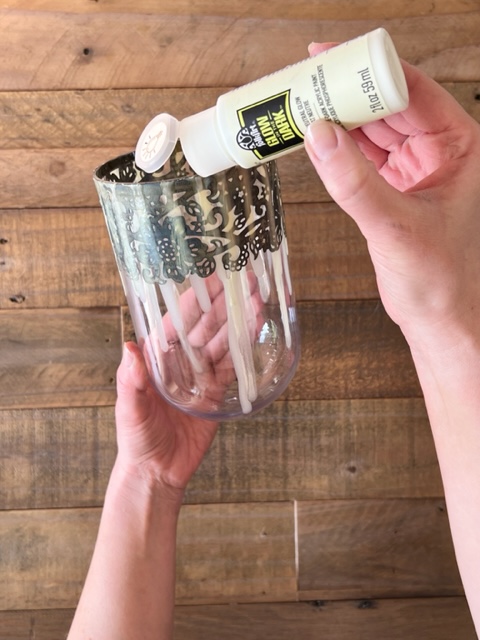
The base of the bell jar is wrapped with a decorative border which was die-cut using our Butterfly Flutterings die set. As part of the Halloween themed make-over, I let glow-in-the-dark paint drip down the sides of the jar.
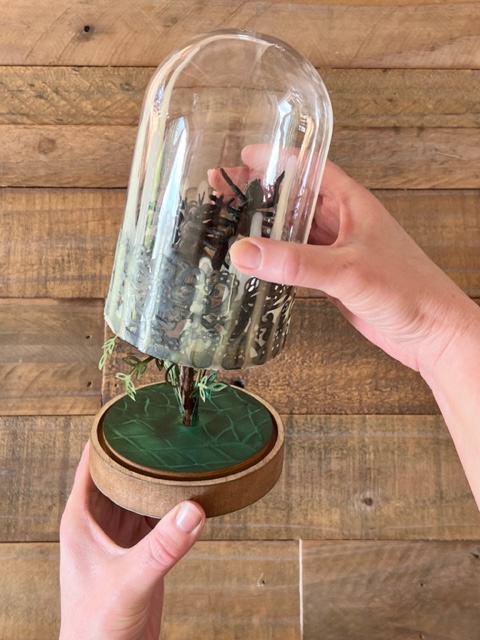
I allowed the paint to dry naturally overnight and then the jar was ready to slot over the base.
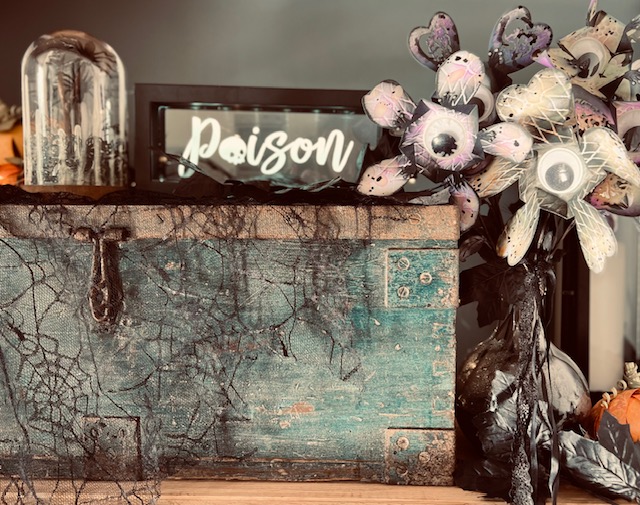
It’s great to make a few new Halloween decorations each year and I just love how the bell jar looks next to the frightening flowers!
I hope you like these creepy decorations and that you have a fang-tastic Halloween!
Angela
x