Hair-raising Spooky Bride, Spinning Wreath and 3D Tree!
If you’re looking for something a bit different to make this Halloween, then we’ve got you covered!
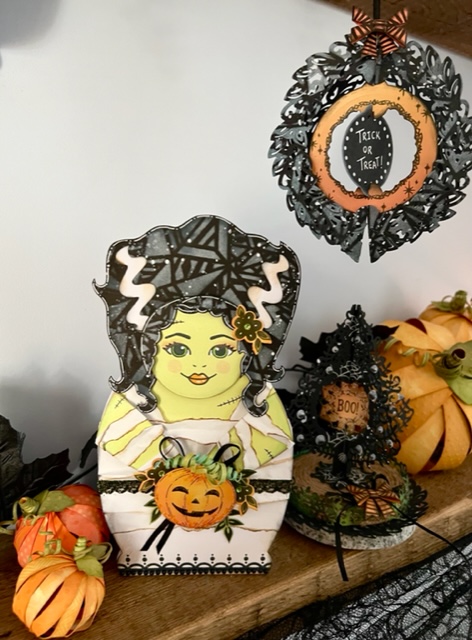
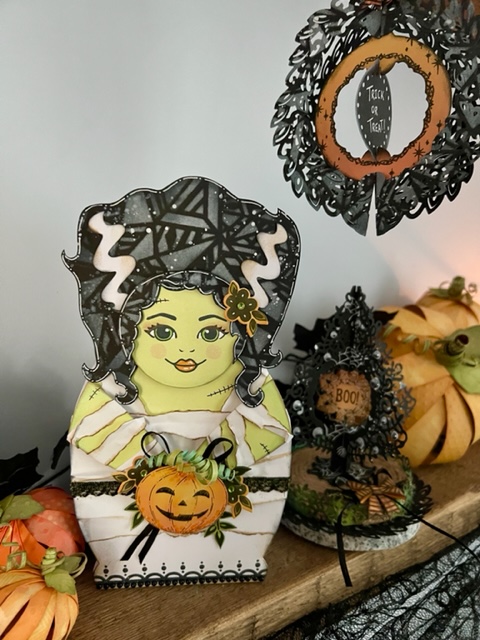
This spooky Bride of Frankenstein card is quick to make, as it uses our Folksy Charm Dolls Die Set to cut many of the pieces. (This die set is currently on sale at 50% off!) Templates for her gorgeous, voluminous hair, plus the arms can be found on our website as a free download HERE.
Last year, I used the same die set to make a set of three fantastic witch, zombie and Day of the Dead Halloween cards. The Folksy Charm Dolls Die Set is so handy for making fun, seasonal characters!
Bride of Frankenstein card
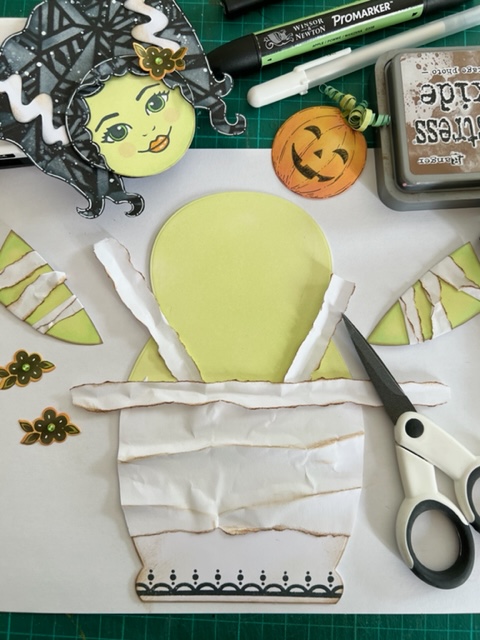
To make this card design, you’ll need our Folksy Charm Dolls Die Set and the FREE downloadable template. I used the template to cut out the hair from black card, and the two arms can be cut from either light green card (or you can colour white card!)
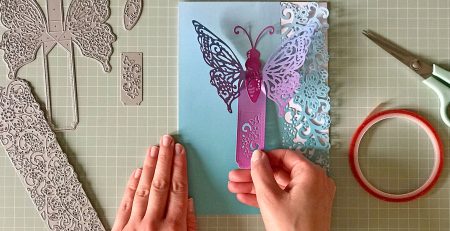
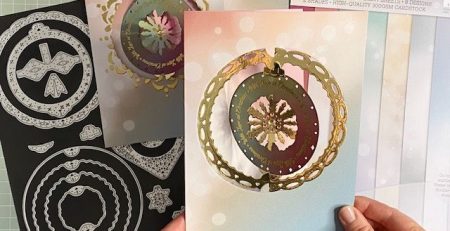
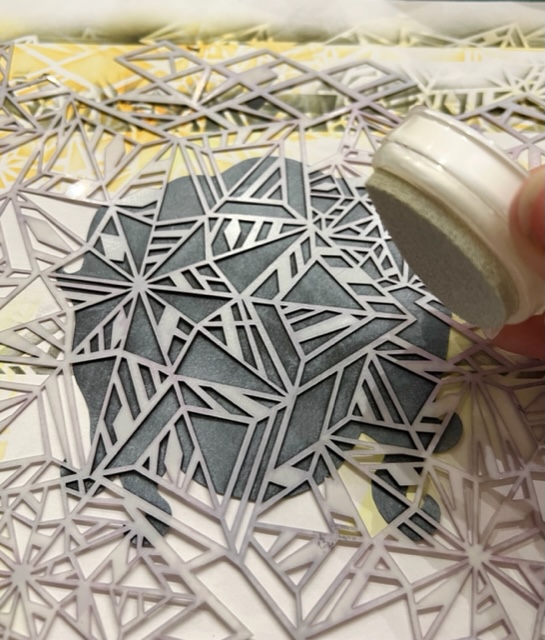
Our new A4 Crystal Stars Stencil creates a wonderful geometric pattern, and I use it again and again when crafting. During our latest TV shows, we mentioned that changing the ink colours you use with this stencil would make it perfect for Halloween crafts… and you can see how good the results are!
Here, I’ve used a white pigment ink to add a cobweb-like effect over the black hair.
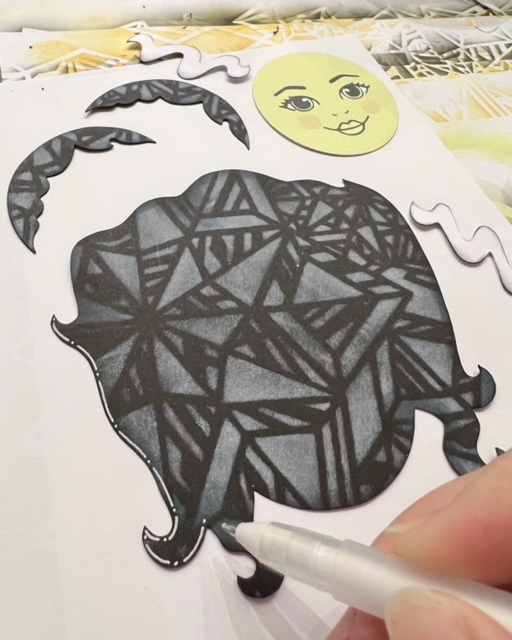
I drew an outline of dashes and dots around the edges of the hair, and also die cut the fringe pieces using the Folksy Charm Dolls Die Set to add definition. The white hair swirls are cut from white card, using the free template as a guide.
To make the bride’s face, I first used the Folksy Charm Dolls Die Set to die-cut the largest circle, and then stamped the face using the co-ordinating Folksy Charm A4 Photopolymer Stamp Set (also on sale at 50% off!)
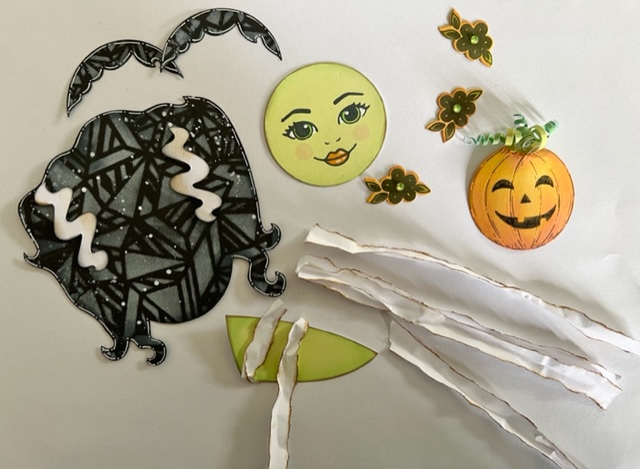
A smaller circle die from the set was perfect for cutting out a pumpkin shape. I drew the pumpkin’s face using a black fine liner pen, and the green pumpkin tendrils are made from three thin strips of green card which were wrapped around a cocktail stick to coil them.
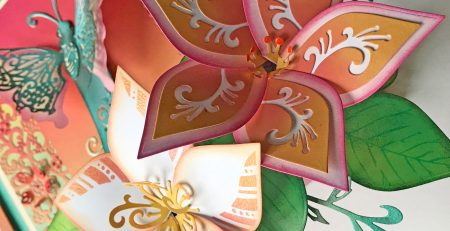
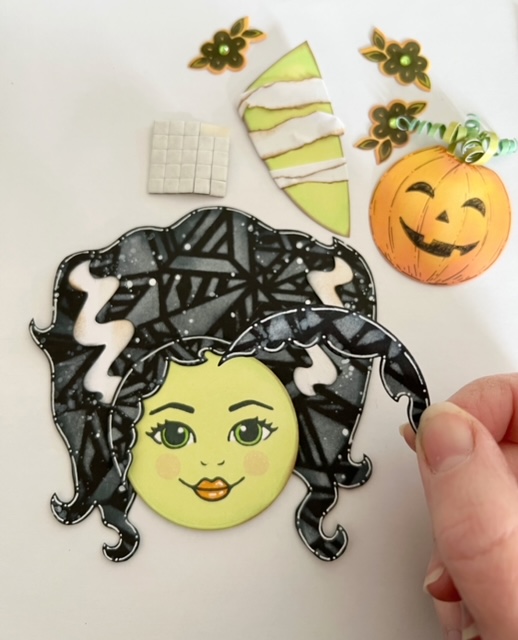
The flowers shown below are die-cut and stamped using the same Folksy Charm dies and stamps. To make the bride’s arms, you’ll need to use the free template. I coloured the arms using a light green ink pad, and the arm ‘bandages’ are made from torn strips of white paper. You can add a distressed look to the paper bandages by lightly inking the edges with brown and black ink.
All of the pieces were assembled using sticky foam pads for a 3D look.
The doll-shaped card base is cut using the Folksy Charm Dolls Die Set. I used another die from the set to cut a white base for the dress. By tearing a few wider strips of white paper, you can build up and layer the front of the dress. Scrunching and inking the edges will help the bandages look more realistic.
The bottom of the bride’s dress has been stamped using a decorative border from the Folksy Charm stamp set. There are lots of borders to choose from, so you can have fun making a bespoke wedding dress!
And here’s how the card looks as the pieces are coming together. I didn’t have any black lace, so I inked up a length of cream lace trim. A thin black ribbon bow was used as the base of the bride’s bouquet.
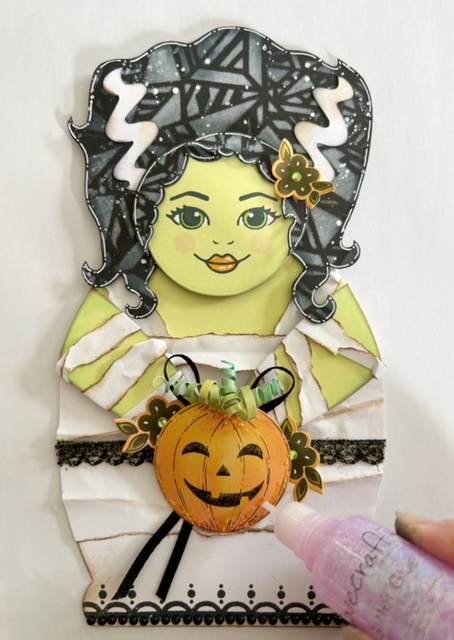
After adding some glitter glue highlights to the pumpkin, I added a few pieces of stamped foliage to the bouquet and a touch of orange eyeshadow to this beautiful bride.
Actually, she looked a bit too beautiful, so I later drew on a few faux stitches to her forehead and arms…well, it seemed to suit the Frankenstein theme?!
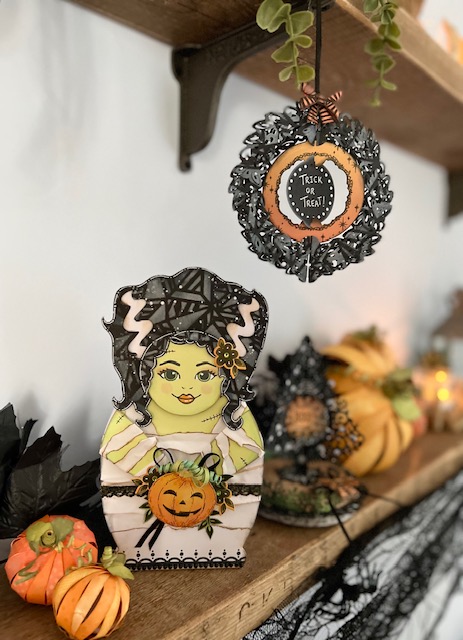
You may have spotted a couple of other Halloween makes in the background…read on for a quick look at how the Tree and Wreath decoration were made!
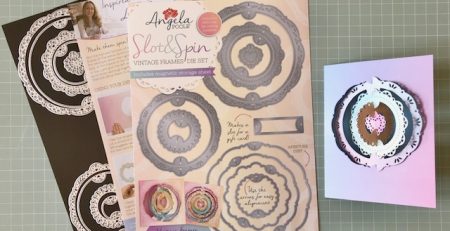
The 3D Tree die from our new Slot & Spin Crystal Christmas Frames Die Set has had a Halloween make-over! I just LOVE the googly eyes – like this spooky tree is watching you!
Spooky Halloween Tree decoration
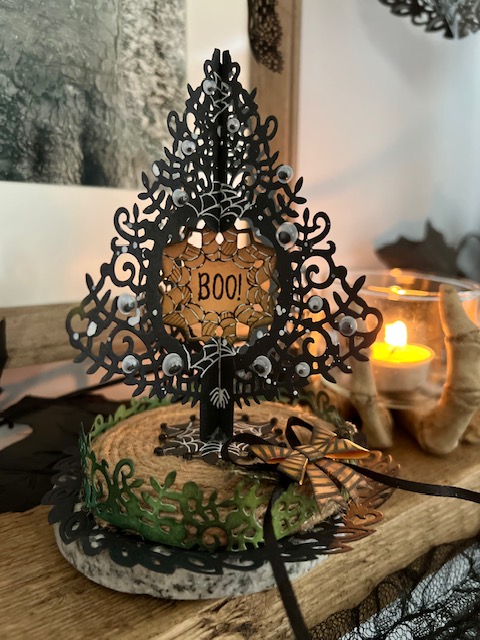
The die-cut pieces of the tree and star simply slot together, as they’re all from our Slot & Spin die set collection. The wreath die was used to create the black lacy base.
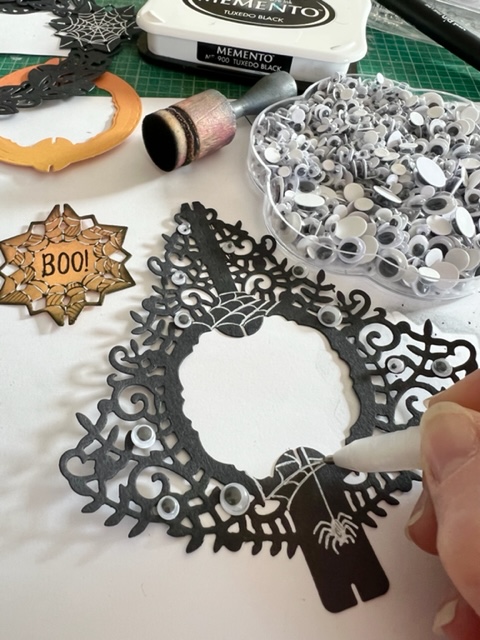
I drew several cobwebs on the two black tree pieces using a white gel pen. The ‘star’ die-cut piece took on a completely new look in orange, with a black cobweb and ‘BOO!” greeting.
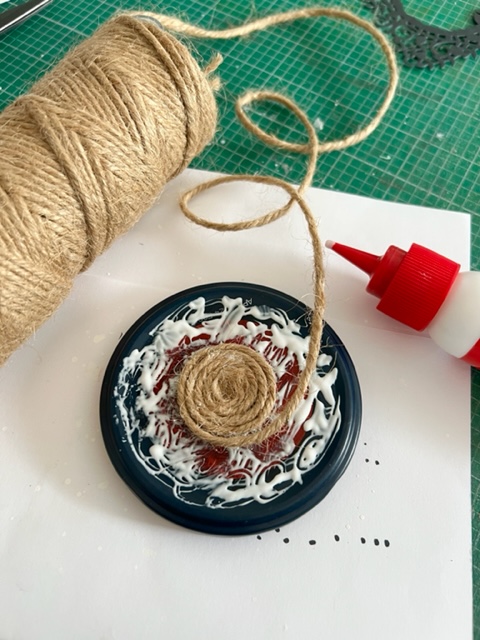
If you were wondering, the tree is stuck to an up cycled jar lid. To do this, I first covered lid with coil of twine. The tree itself can be attached upright with either tacky PVA glue or a hot glue gun. I then decorated the base using other die-cut pieces from the same die set!
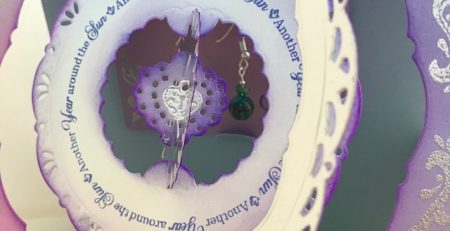
Halloween Wreath decoration
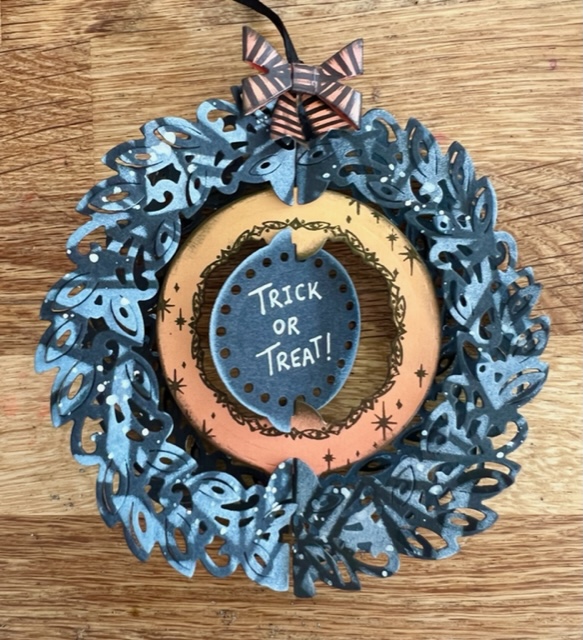
The bonus wreath die from our Slot & Spin Crystal Christmas Frames Die Set is just so versatile! By folding two wreaths in half (just like the tree from the same die set), you can create a stunning 3D wreath like this.
We’re all for mix ‘n’ match crafting options, and so I decided to use a combination of dies from the Crystal Christmas Frames and Festive Frame die sets. The pretty 3D bow is cut using a die from the Festive Frames set.
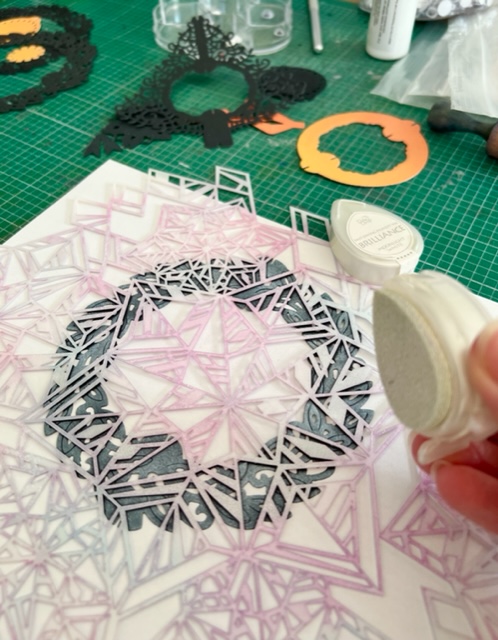
I used the A4 Crystal Stars Stencil and white pigment ink again here to create a cobweb-like pattern over the wreaths.
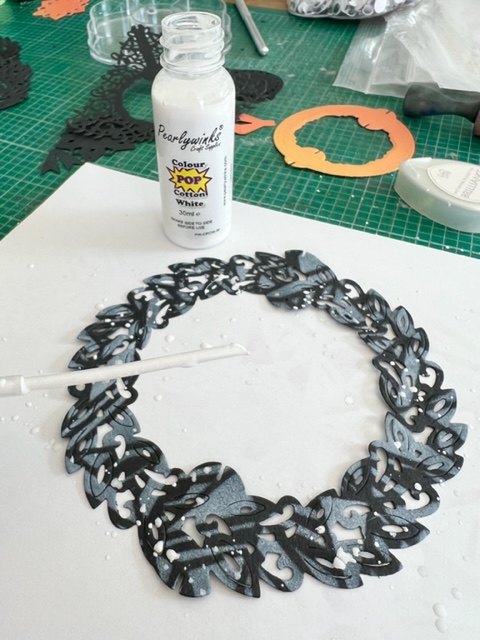
I flicked Cotton White Colour Pop from Pearlywinks over the wreaths (I did this to the hair of the Bride of Frankenstein too).

The decorative circular border and sparkle stamps are from our Crystal Christmas A4 Photopolymer Stamp Set. I inked the edges of the cut pieces with either black or white ink, to tie it all together.
I hope you like these spooktacular Halloween makes,and please stop by again for more crafting inspiration!
Happy Halloween!
Angela
x