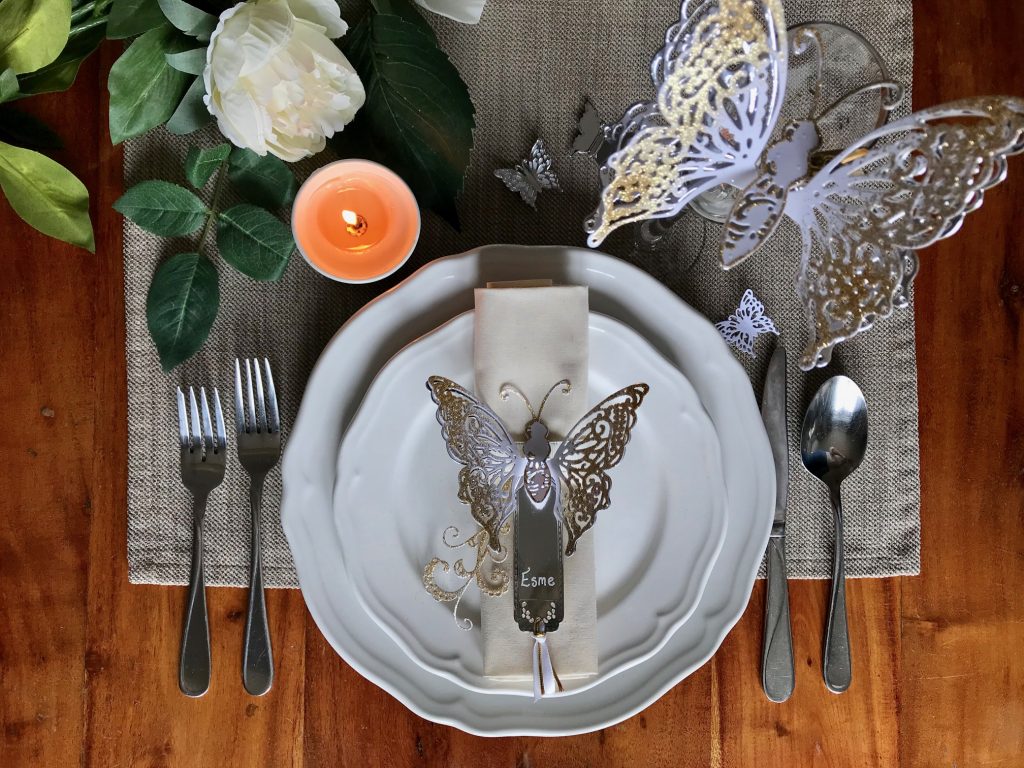
Elegant table decorations for weddings and parties!
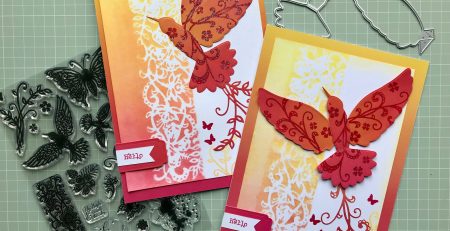
These table decorations are absolutely stunning and are bound grab the attention of your guests! You can make them using either of our new Flutterings die sets, as both the Butterfly and Hummingbird look wonderful as table decorations!
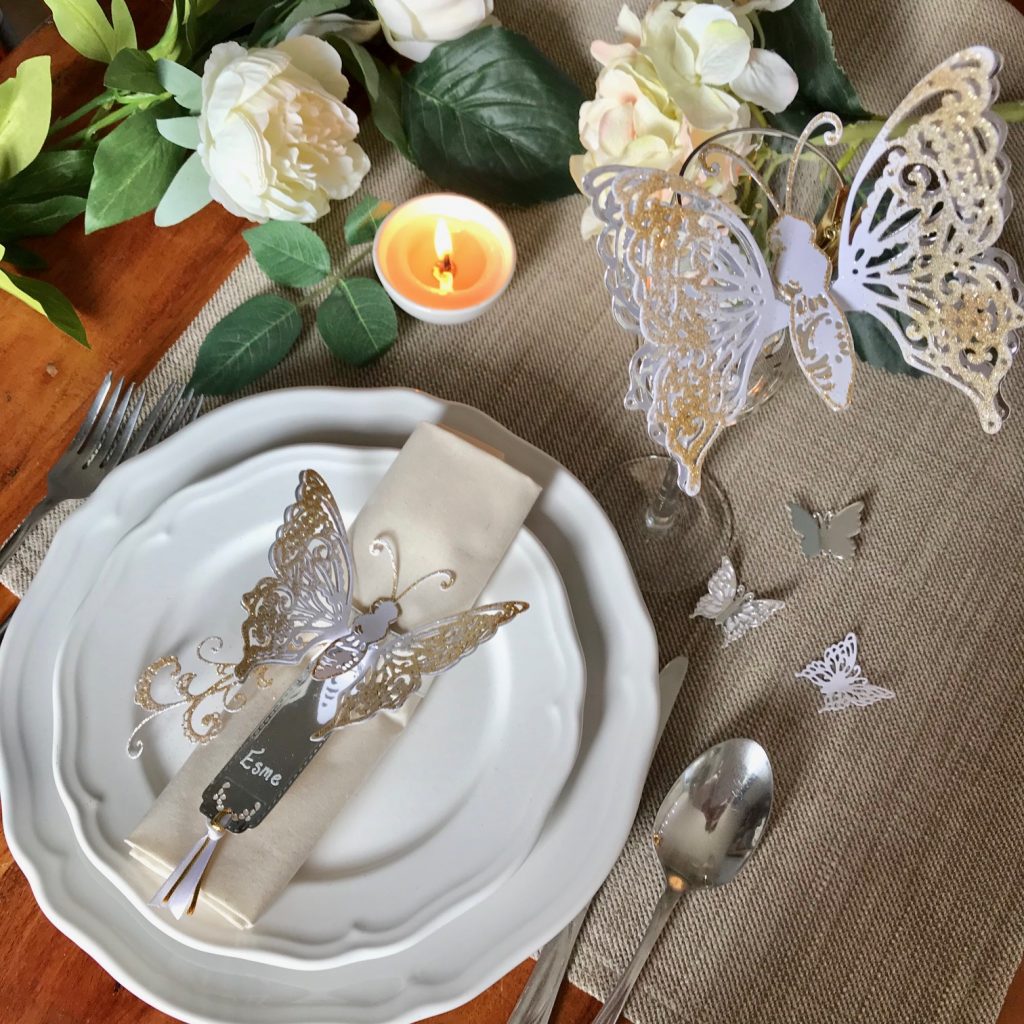
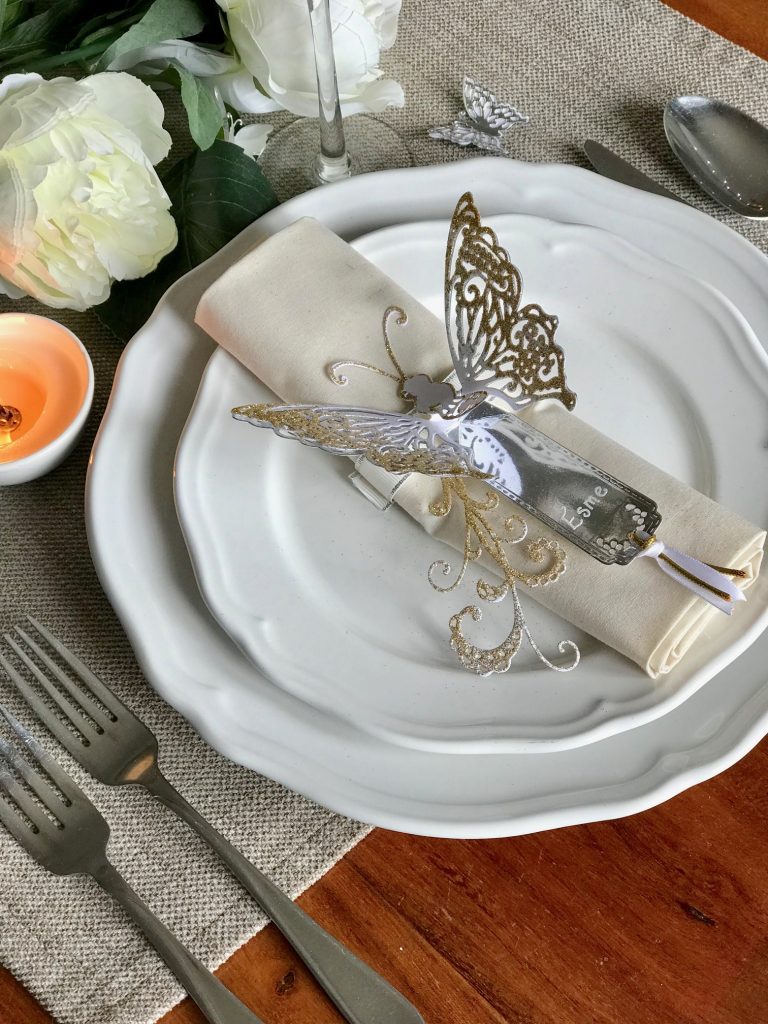
The tabs are handy for writing place setting names like this beautifully decorated napkin. A ribbon has been used to wrap the napkin and the other elements have all been die-cut from card.
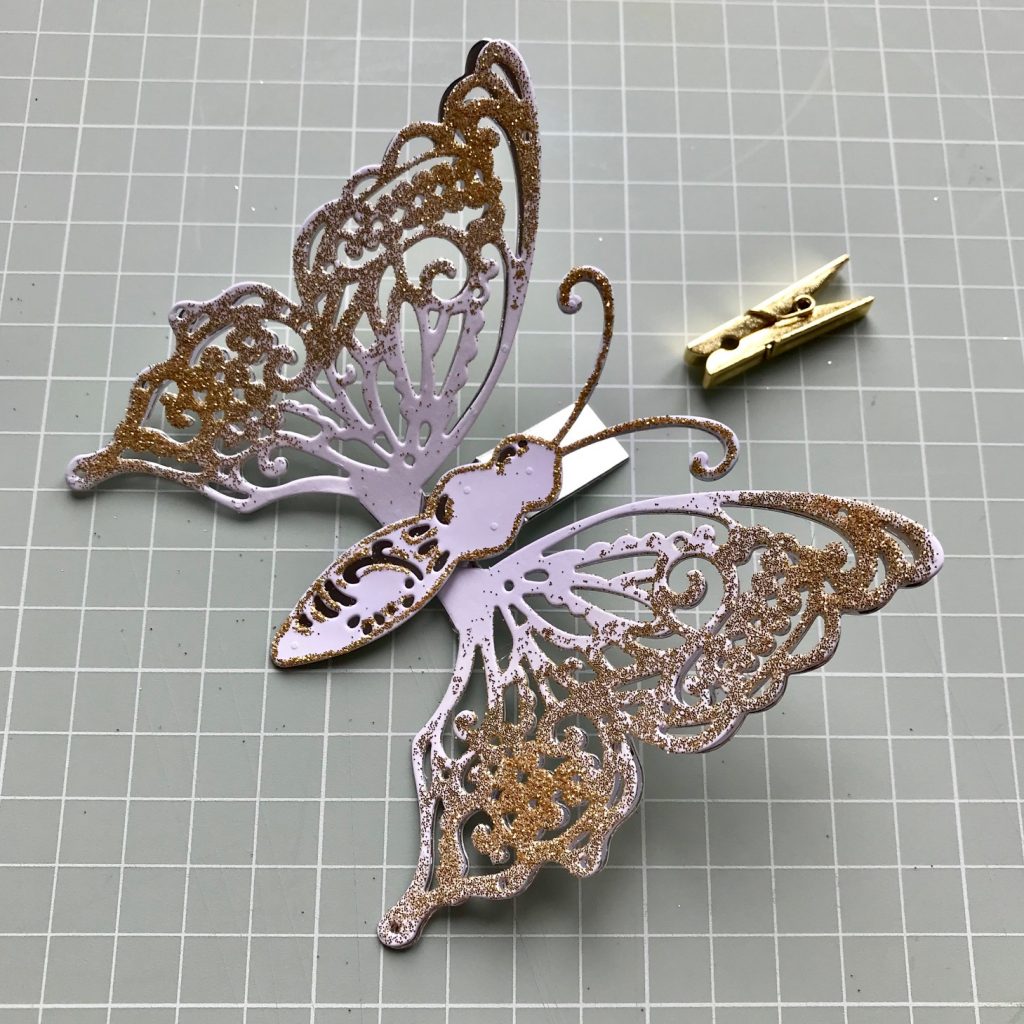
You can also attach the Flutterings Butterflies or Hummingbirds to wine glasses with mini pegs! I’ve chosen champagne glass here because I love the shape . . . and a glass of bubbly!
These butterflies won’t flap unless the head of the butterfly is anchored but the folds in the wings create an angle which makes them look like they’ve fluttered down and landed on the edge of a glass!
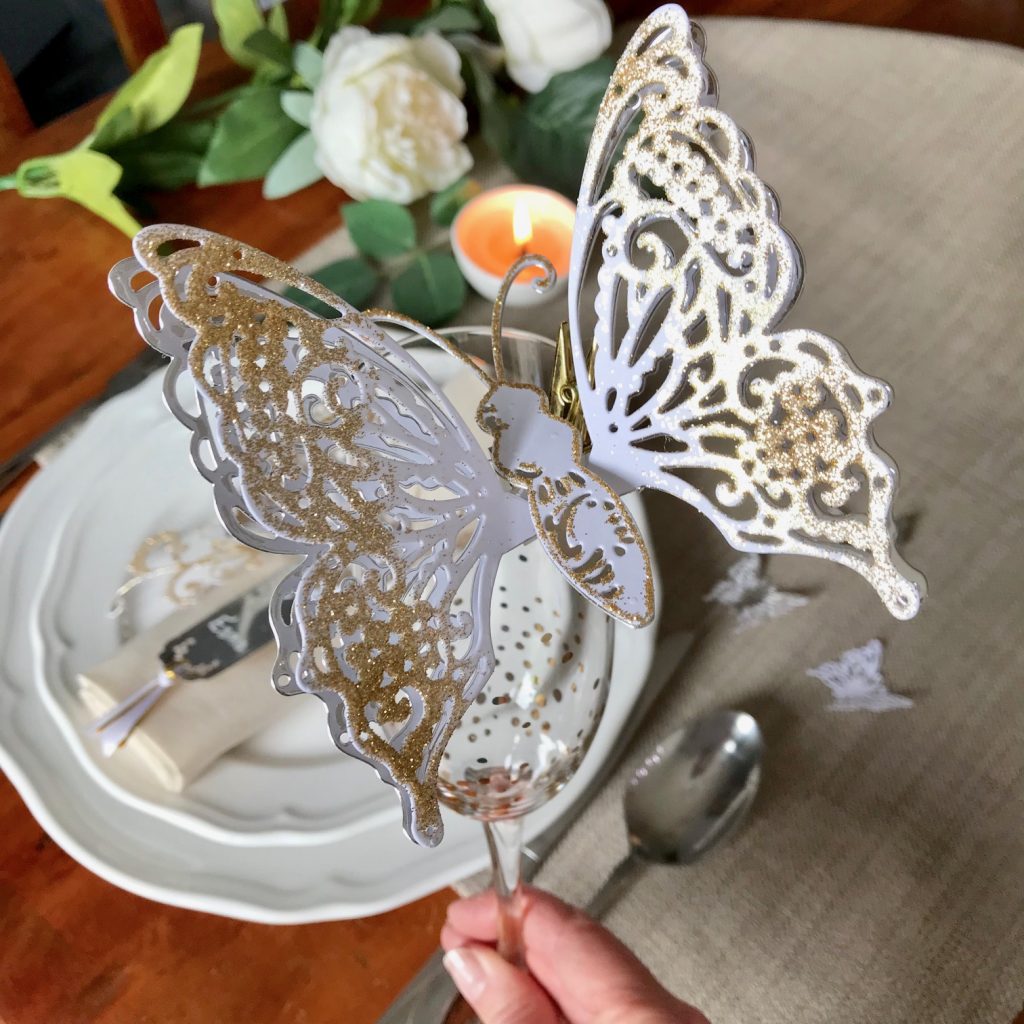
Here’s a close up of the butterfly, which is attached to the glass with a pretty gold peg. The pull tab has been trimmed away and I’ve created a double layer of the lacy wings for extra impact.
The flourish from the die set is handy for making decorations too and the smaller butterflies are perfect for scattering around the table, like confetti.
The lacy design of the wings is so pretty that you could use them exactly as they die-cut, without fussing over embellishments or other techniques – which might be handy if you have hundreds to make for a large party!
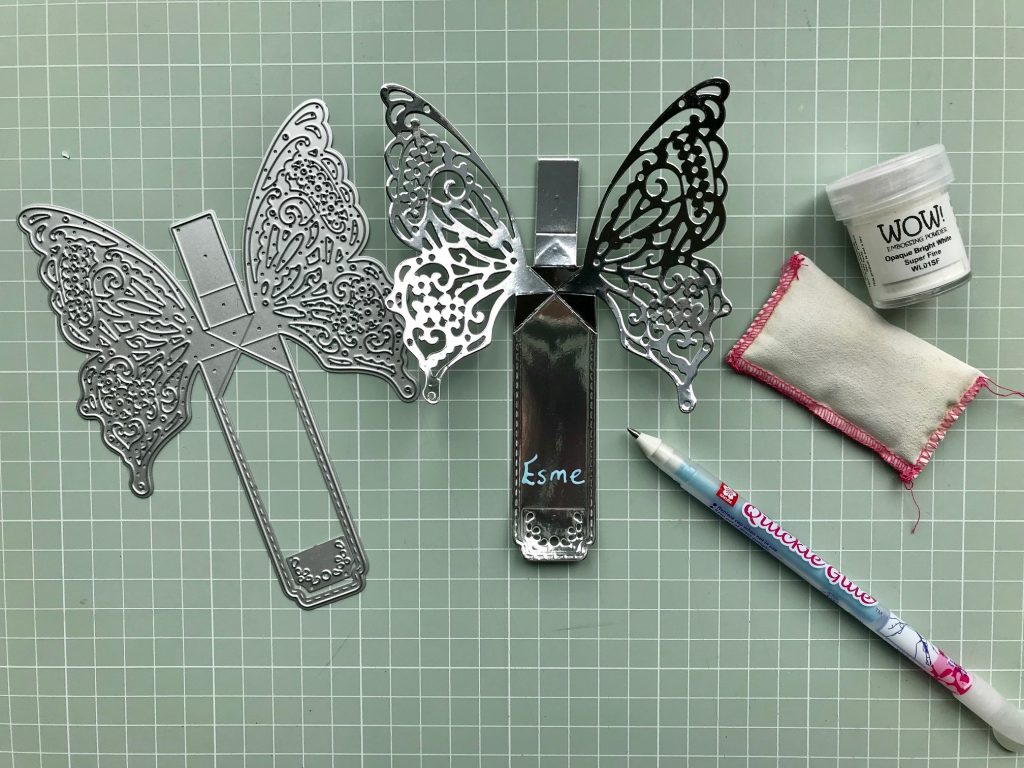
I’ve die-cut the wings and tab piece from silver Mirri card and it looks really striking! Around 200gsm card works best with the Flutterings dies and depending on the finish of the card, you can write names for your place settings with a pen. I’ve used a glue pen to heat emboss a white name on the tab (mainly because I didn’t have a suitable white pen!).
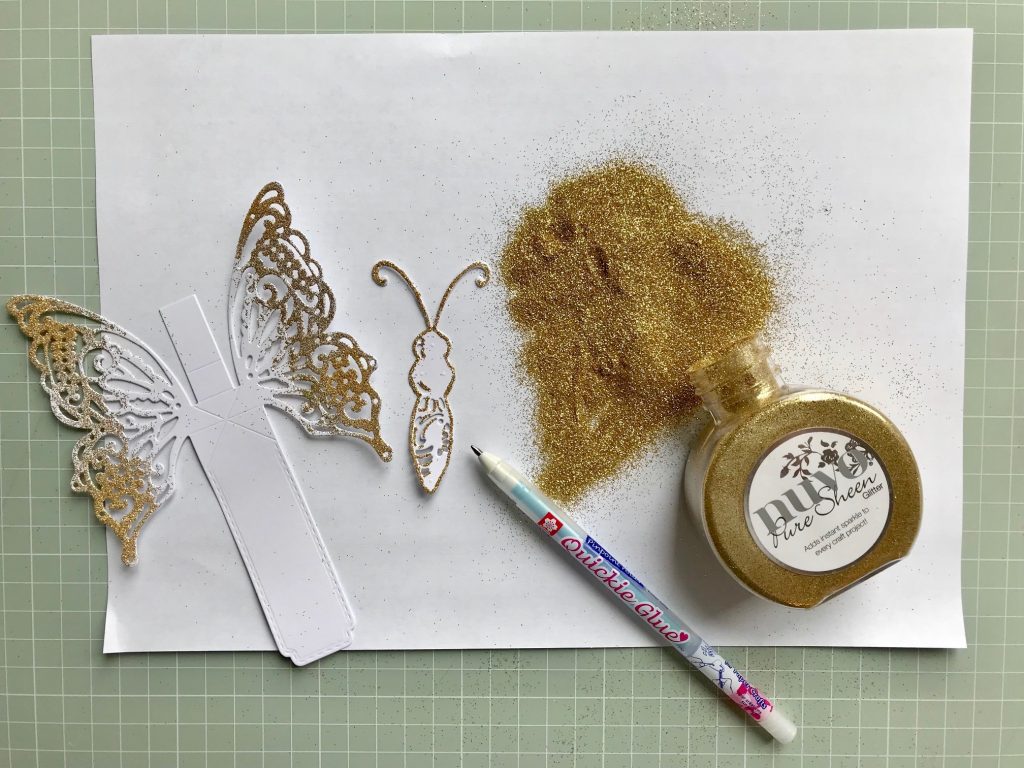
I knew I wanted to use metallics in this design but couldn’t decide whether to go with a silver or gold colour scheme . . . so I chose both! The wings do look lovely inked up but to save time, I sprayed adhesive along the outer edges of the wings and then sprinkled gold glitter over the top. After a bit of experimenting with the butterfly’s body, I found that using a glue pen to draw and outline and highlight a few details looked the best for this decoration. If I was making dozens of butterflies though, I’d probably choose to keep the lacy body a plain white or perhaps solid gold glitter!
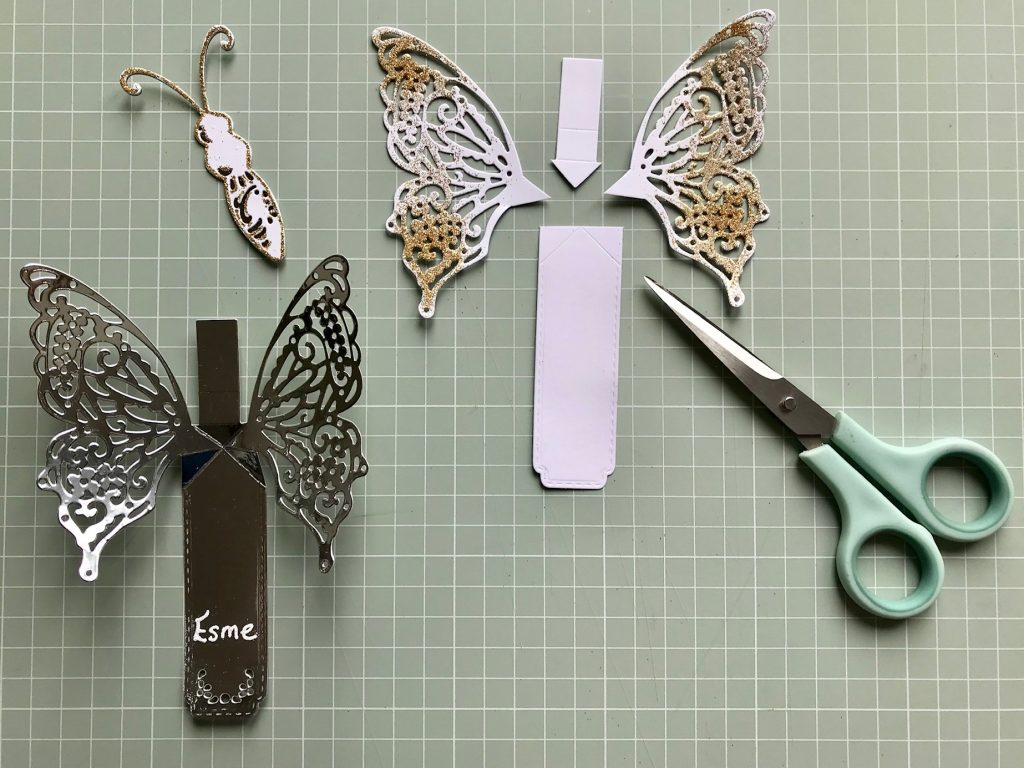
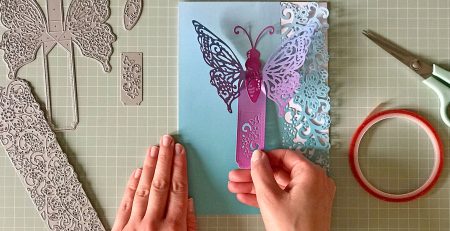
If you’d like to layer up the lacy wings, then you start by trimming the wings away from the tab piece, so that just the triangular points remain on the wings of the top layer.
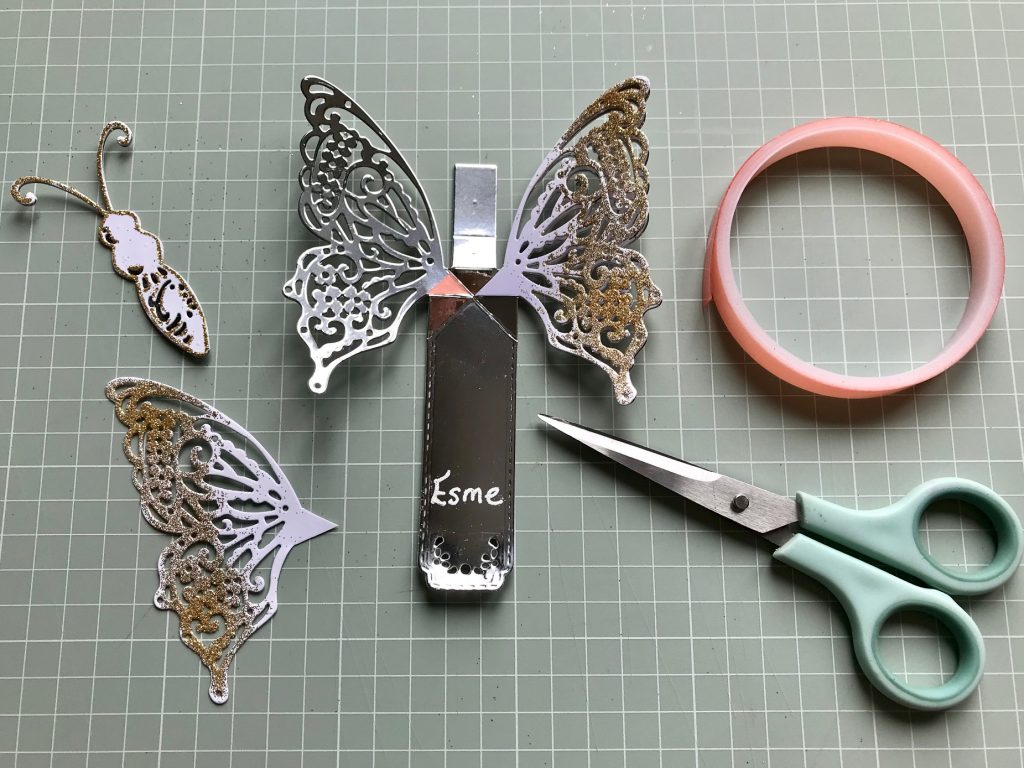
You can then layer up the lacy wings with high-tack double-sided tape. Tacky PVA glue can be used instead, but you’ll need to allow drying time and I’m frankly too impatient a crafter!
I must share how this looks with lacy vellum wings soon, as it’s currently one of my favourite techniques using the Flutterings collection!
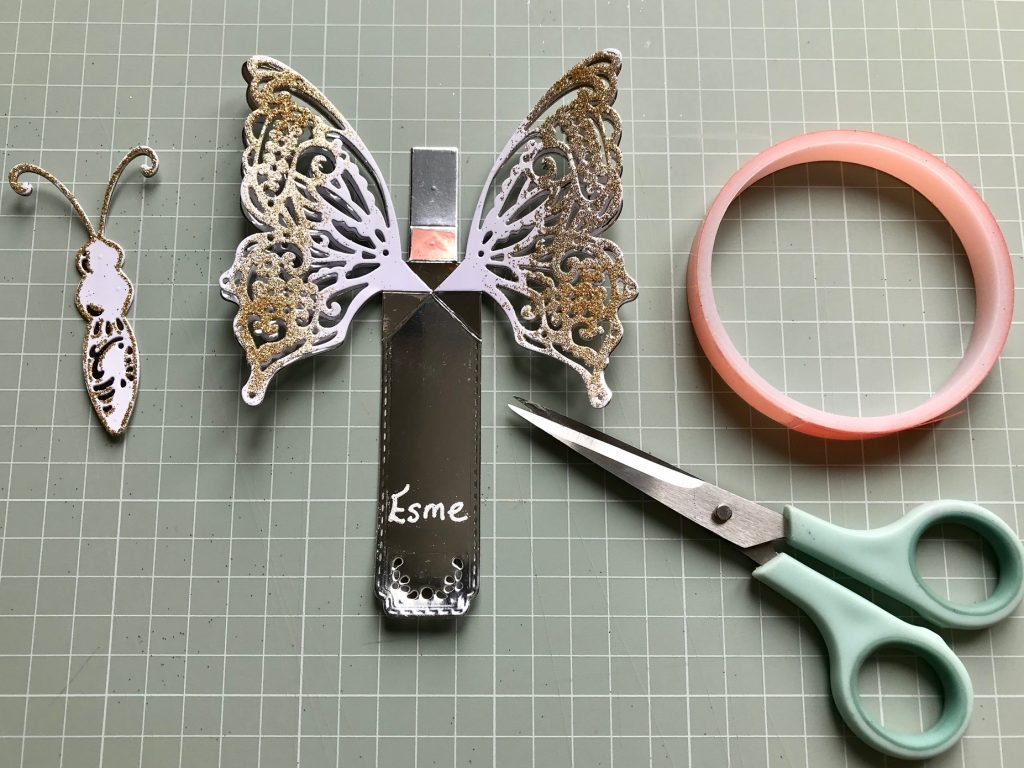
The next step is to attach the middle part of the butterflies body to the rectangle shown with high-tack tape in this photo.
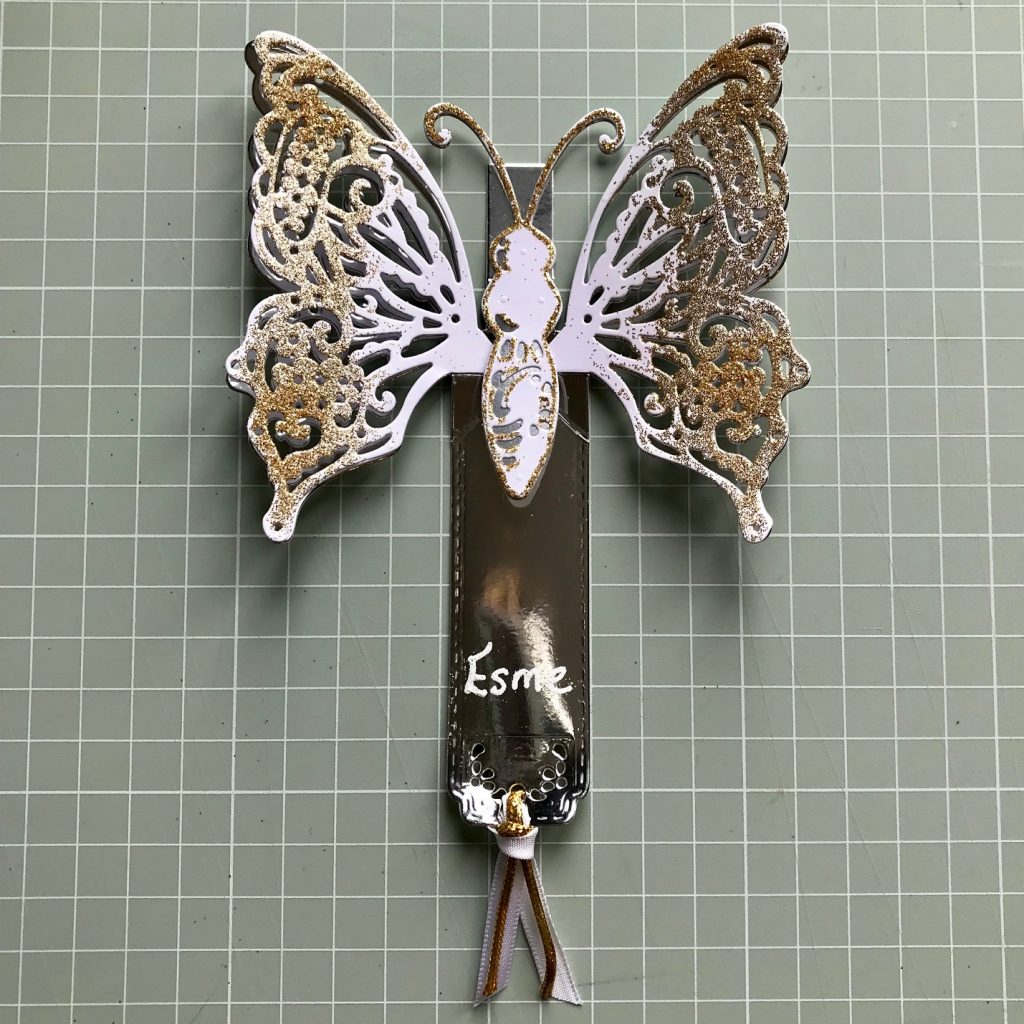
If you’ve used a die insert to punch a hole in the bottom of the tab, then you can secure a couple of trims/ribbons through it with a loop knot. The flap at the top of the main piece will fold over and you can either tuck it under a ribbon to decorate a napkin, or attach it to a glass using a small peg.
You can see below how the butterfly looks when the pull tab has been trimmed away:
The die will score the fold lines that create the lovely perched angle when the butterfly or hummingbird are attached to the edge of a glass.

I hope you’re enjoying using the Flutterings die sets, and are discovering lots of interesting ways to use them.
Please stop by again for more inspiration!
Happy crafting!
Angela
x